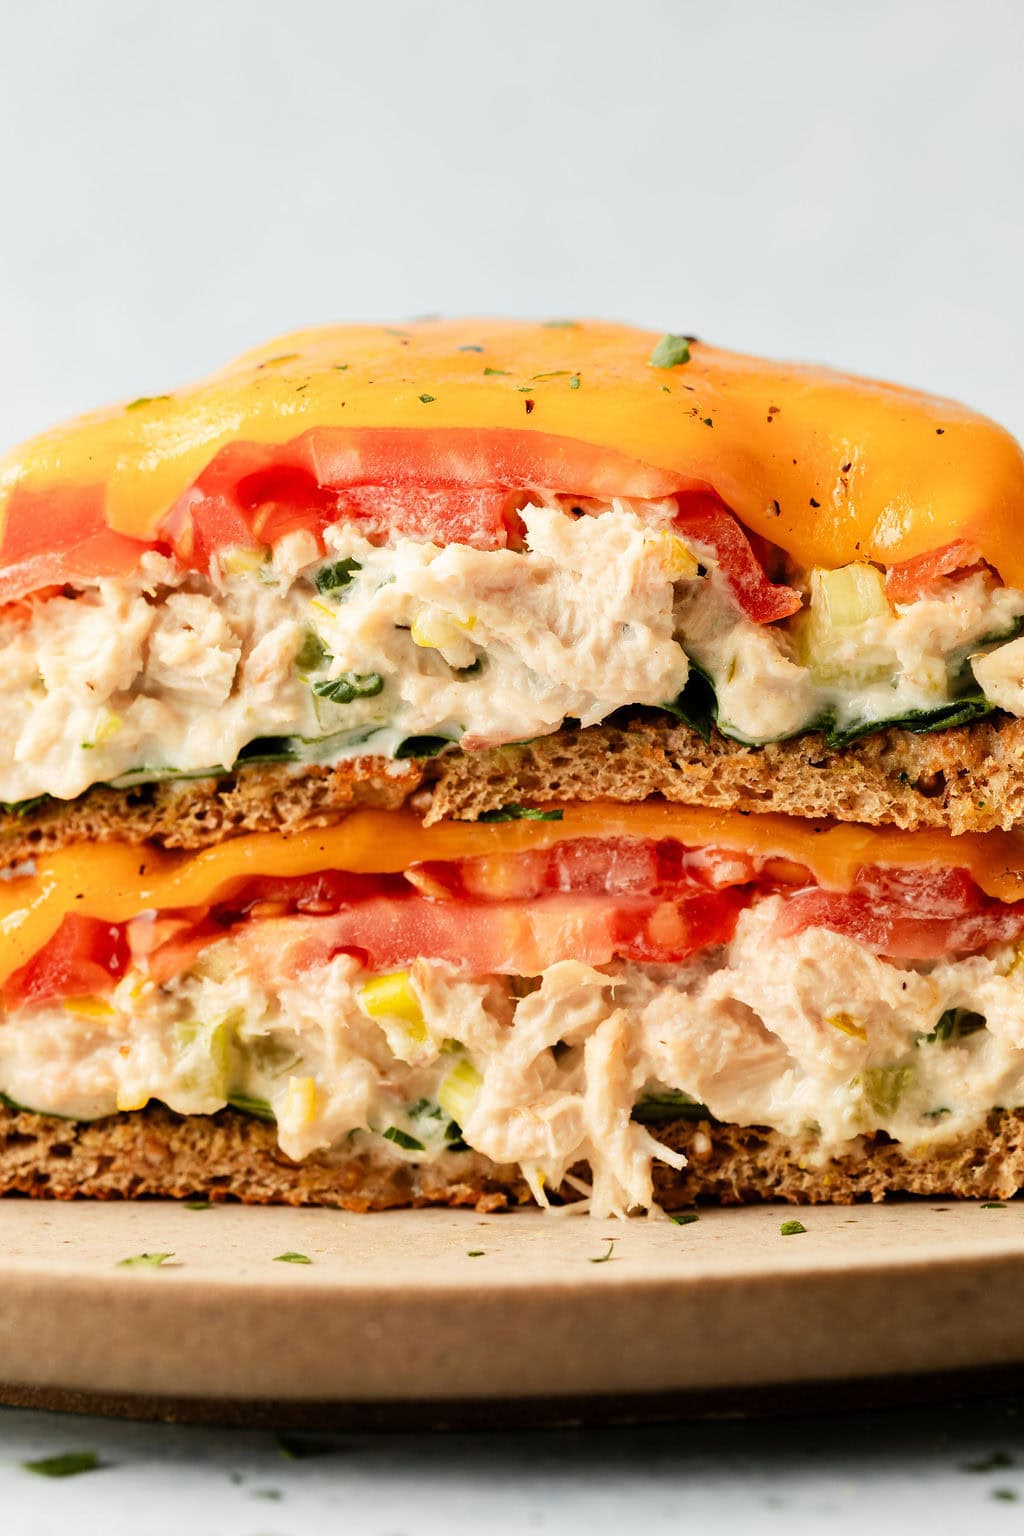
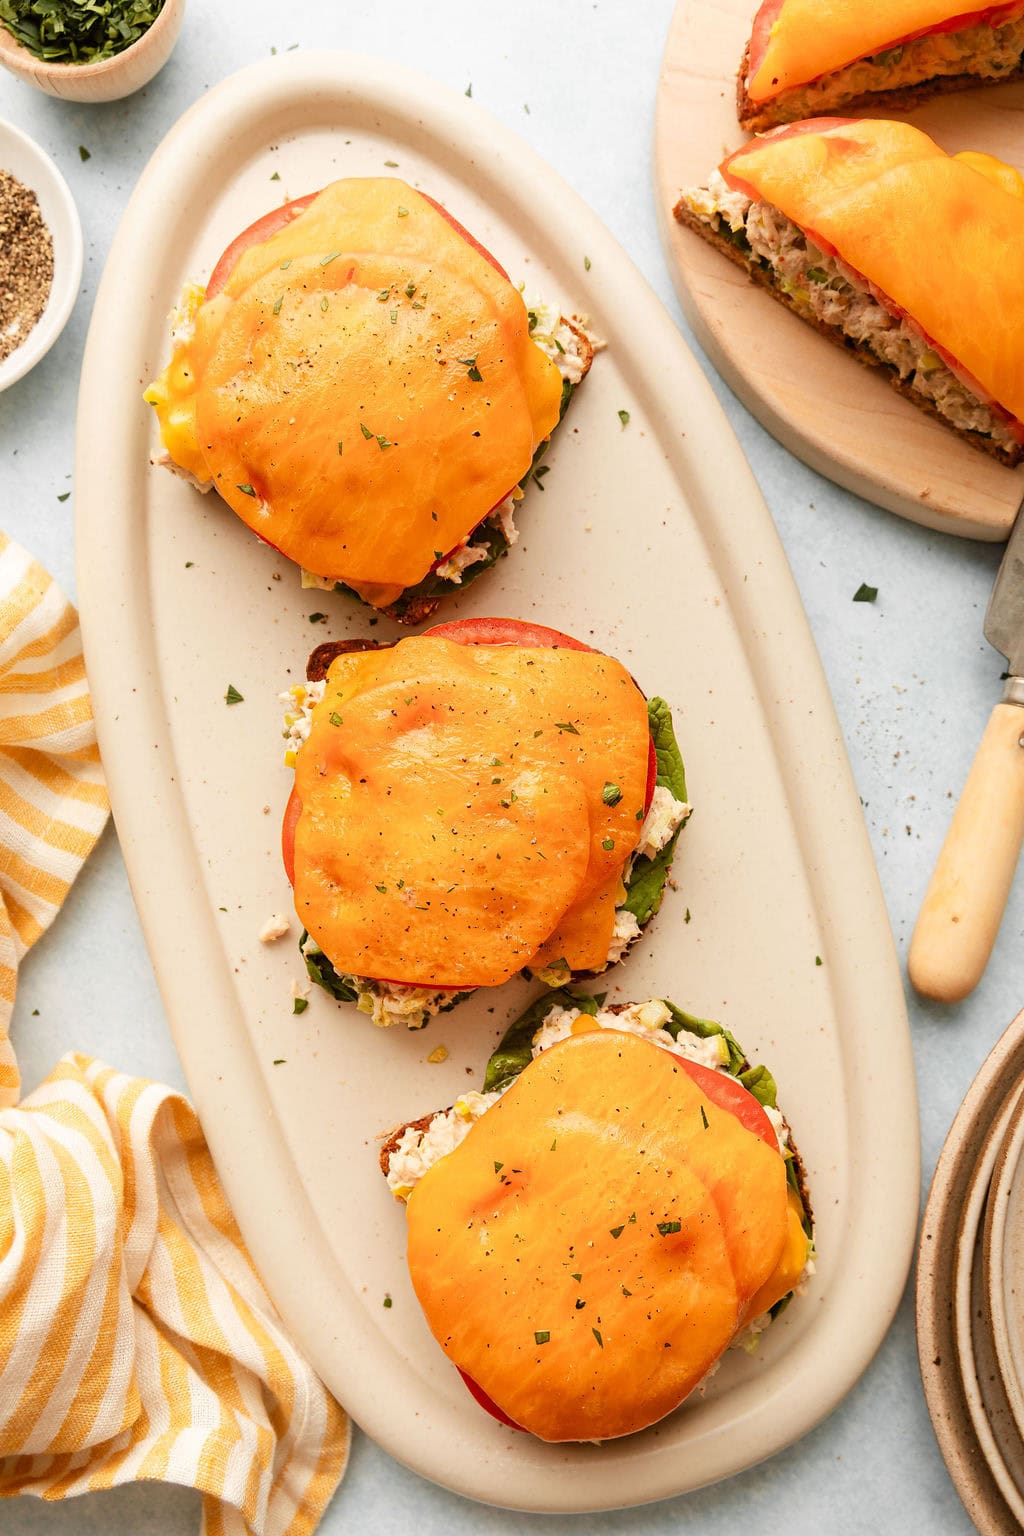
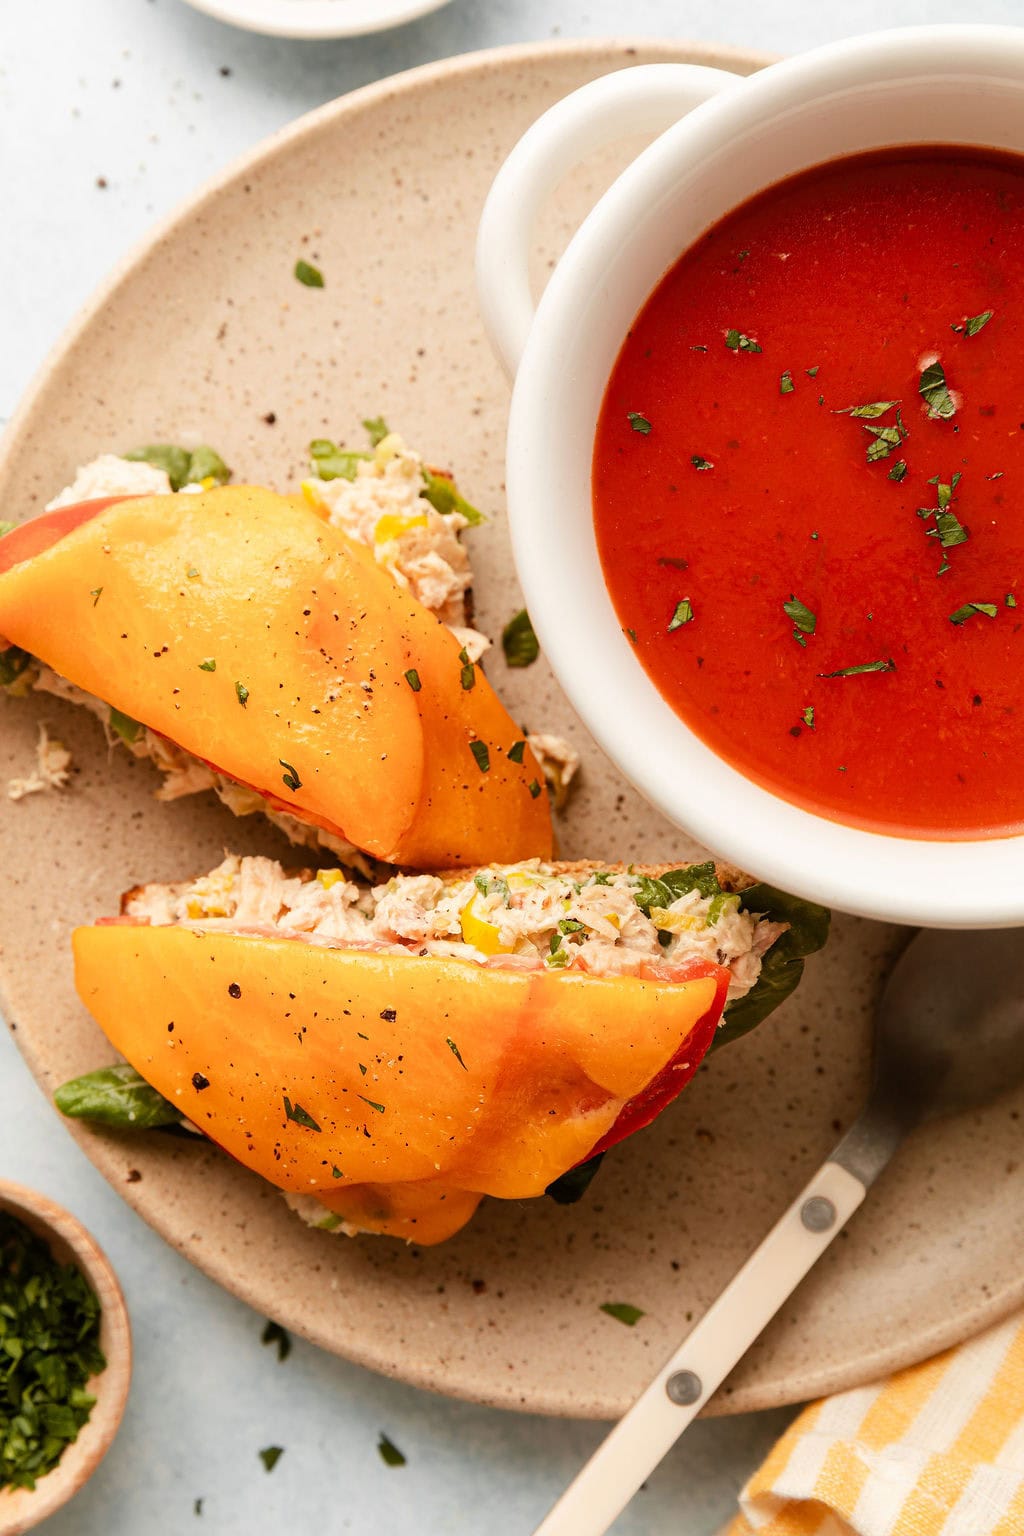
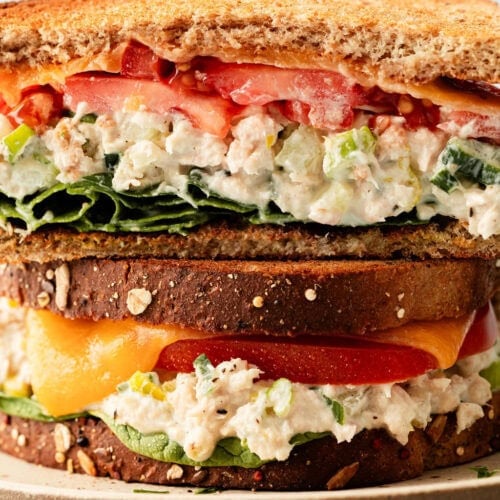
Simple tuna melts are my favorite 10-minute meal solution, whether I make one as a quick lunch for myself or as a fast and delicious dinner for my family on busy weeknights. I often serve these tuna melts with tomato soup, especially during Lent when we eat fish on Fridays. Not only is this simple recipe a great way to help meet my daily protein goals, but it’s also a meal that my kids love to eat, which is always a win in my book.
Recipe Highlights
Easy and fast: I love that I don’t need to reach for a skillet to make these tuna melts. I simply mix a few pantry and fridge ingredients together to make the tuna salad and then assemble the sandwiches on a sheet pan. I pop them under the Broiler until the cheese is melted, and I’ve got a delicious lunch or dinner in just about 10 minutes.
Nutrient dense: Tuna is a great source of protein and omega-3 fatty acids, which are two nutrients that I know are good for my body and brain. When served as tuna melts, I’m also getting the benefits of energizing carbohydrates and fiber from the bread and veggies, so it’s a well-rounded meal from just a few ingredients.
Budget friendly: Canned tuna, bread, and sliced cheese are everyday affordable staple foods that I always keep on hand so I can make simple healthy meals.
Ingredient Notes And Substitutions
These easy sandwiches require just a few simple and budget friendly ingredients. Here are my notes about the main ingredients, as well as a few of my favorite brands.
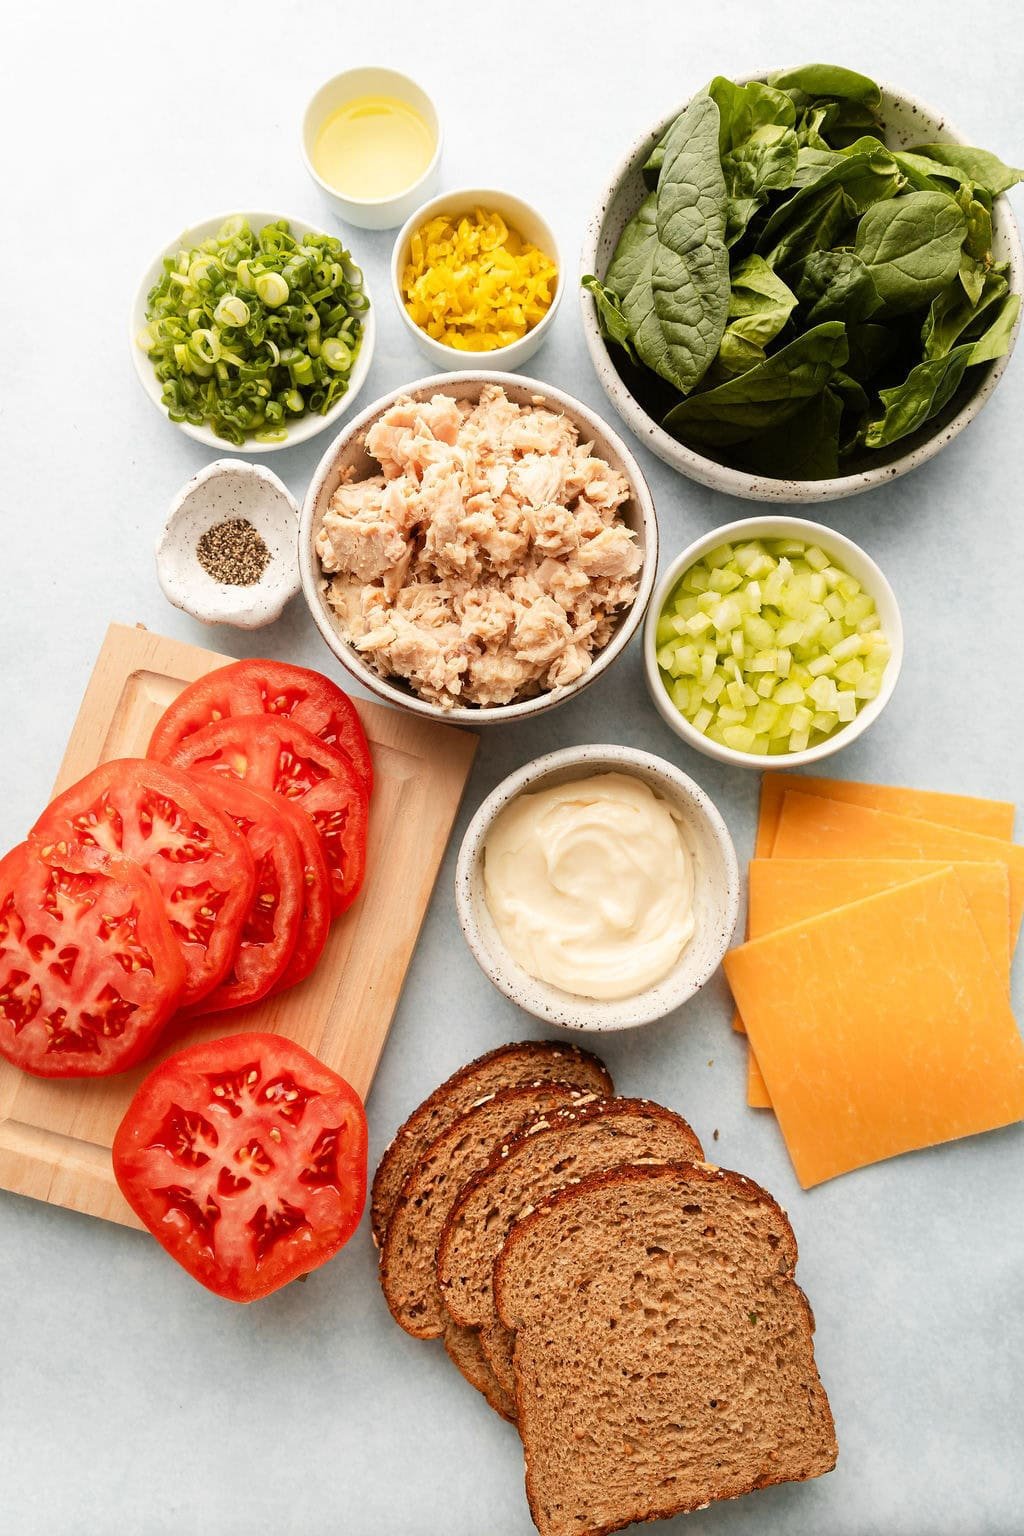
- Tuna: I use two cans of water-packed tuna and I always buy sustainably wild caught canned tuna, such as Wild Planet albacore tuna or SafeCatch tuna. Those brands are naturally lower in mercury, better for the oceans, and have a clean taste and firm texture. And, for something a little fancy, I’ve also been loving the Fishwife canned tuna lately, which is packed in extra virgin olive oil and comes in spicy and lemon flavors, too. Canned salmon also can be used in place of canned tuna.
- Cheese: Most often I reach for slices of Swiss cheese to top these tuna melts, but any type of cheese will work. Some others I like are sharp Cheddar cheese, havarti, Gruyere, and American cheese. Also, if sliced cheese isn’t in the fridge, I’ve also used shredded cheese and it works great.
- Bread: Personally, I love to make these warm tuna sandwiches on my favorite sourdough bread, rye bread, or a whole-grain sandwich bread. I’ve also made them on English muffins, bagels, and tortillas. Any favorite bread will work.
- Peperoncini: I recently discovered that I absolutely love tuna salad with peperoncini. It adds a touch of acidity that really makes the tuna salad pop with flavor. When I don’t have a jar of peperonicini, I’ve also used diced banana peppers, dill pickles, and pickled red onions instead – any of those options also help create that tangy flavor I’m going for. I also think capers or pickled jalapenos would also create a similar effect. For something sweet, try roasted red peppers.
- Mayo: I use mayonnaise made with avocado oil for healthy fats, especially a better ratio of unsaturated fats to saturated fats. For an egg-free version, use plain full-fat or 2% fat Greek yogurt instead mixed with a teaspoon or two of Dijon mustard or lemon juice.
- Veggies: I always add some veggies to my tuna melts, such as spinach and tomato. I’ve also made them with sauteed onions and bell peppers, which was delish. I love the color and crunch that veggies add, as well as the boost of nutrients, including some fiber and vitamin C.
Find the ingredient list with exact measurements in the recipe card below.
How To Make Tuna Melts
These are a few of my tips and tricks for making the best tuna melts:
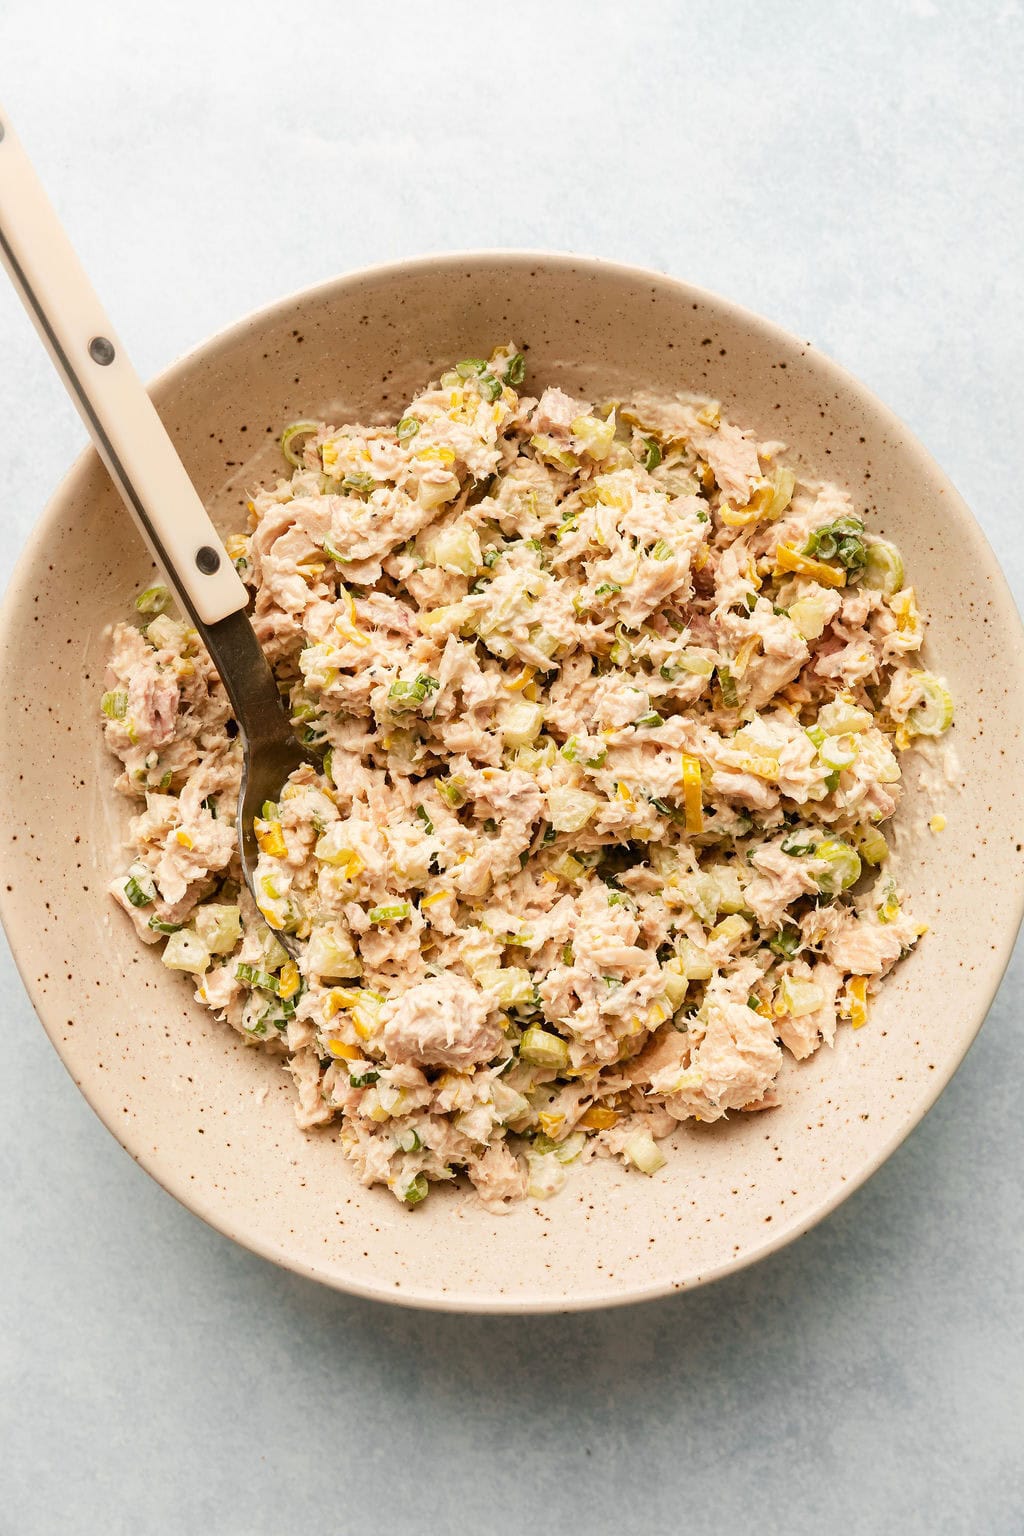
- Make a flavorful tuna salad: This is the main component of tuna melts, and I like to make sure the tuna salad is extra flavorful and has some texture by adding some mix-ins like minced peperoncini, finely diced celery, green onions, and black pepper. Sometimes I add a pinch of kosher salt, too.
- Toast the bread first: I like to make sure the bread is sturdy and doesn’t get soggy by toasting it for a few minutes before adding the tuna salad and cheese. I do this by placing the bread slices in a toaster, toaster oven, or right under the oven broiler just until barely golden brown.
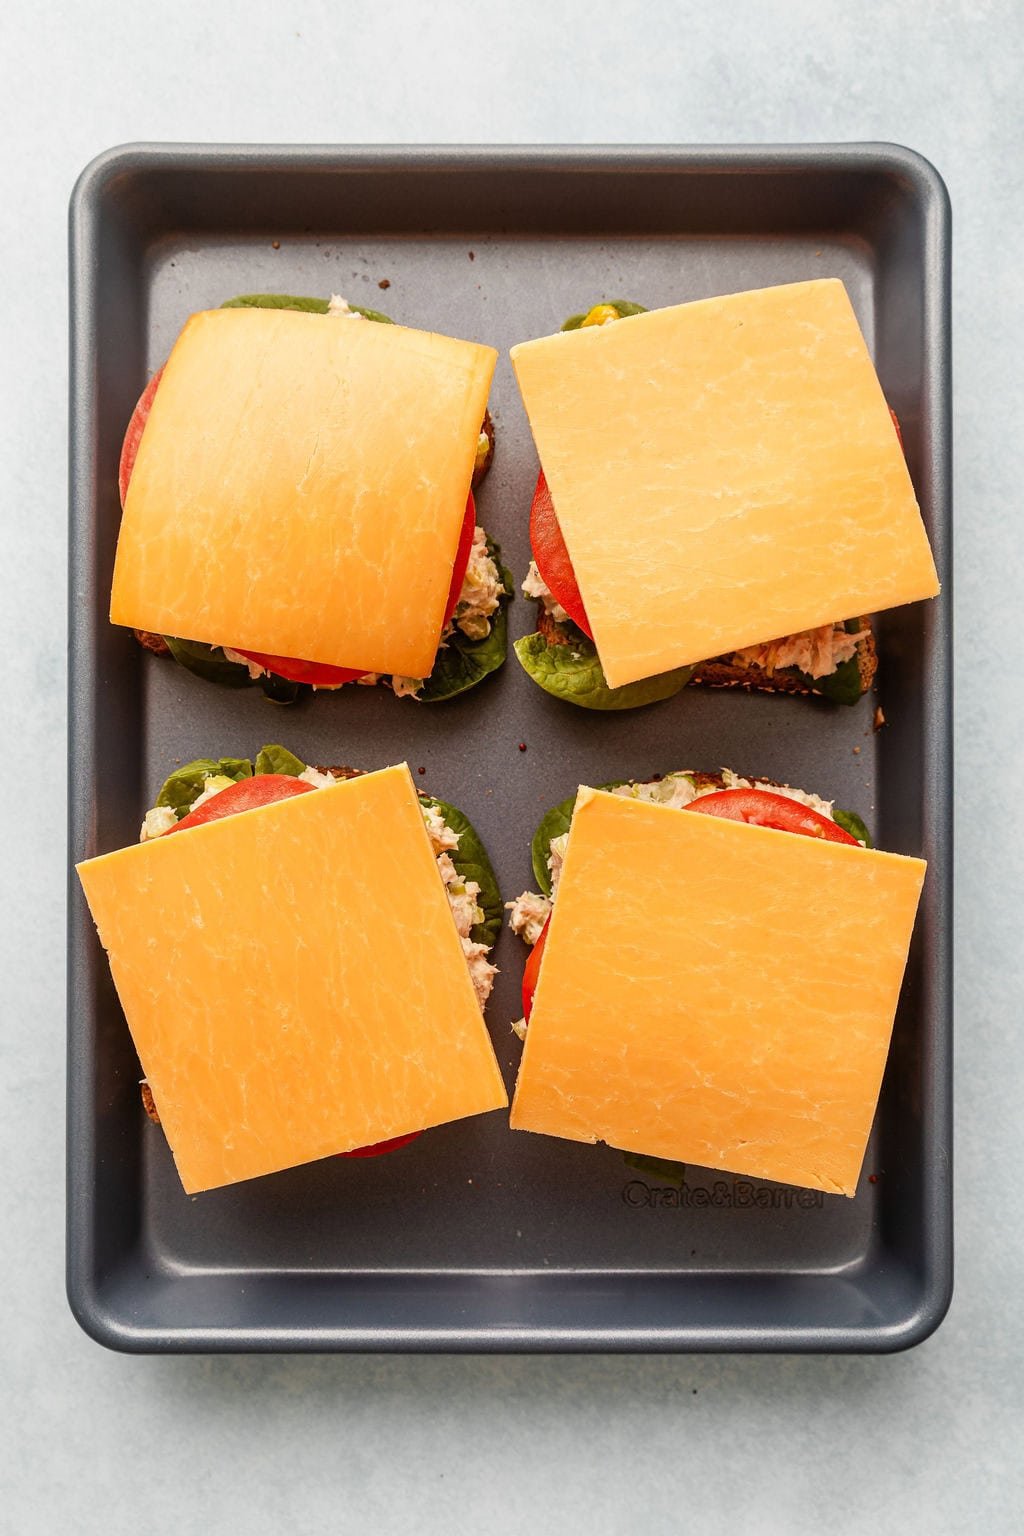
- Assemble the tuna melts: I place the toasted bread pieces on a baking sheet and then top them with some spinach, the tuna salad (it doesn’t need to be warmed first), some tomato slices, and then the cheese.
- Toast them under a broiler: Finally, I toast the tuna melts until the cheese is melted and the tuna salad is warmed through. I do this by placing the baking sheet under the oven broiler. Toasting the tuna melts in a toaster oven with a broiler setting works, too. I prefer using a broiler instead of making tuna melts in a skillet (like I would with grilled cheese) because there’s less risk of the bread burning on the bottom and everything gets more evenly heated.
For serving size and the complete directions and ingredient amounts, scroll down to the recipe card below. All of our recipes include the nutrition analysis, listing calories (kcals), protein, carbohydrates/carb, fiber, sugar, sodium, cholesterol, and more per serving.
Make It Egg Free
Mayonnaise contains eggs, so to make this recipe egg-free, I recommend using plain full-fat Greek yogurt in place of the mayo.
Make It Gluten Free
The gluten in this recipe comes from the bread, so to make gluten-free tuna melts, use gluten-free bread or another gluten-free option, such as a gluten-free bun, English muffin, or bagel.
My Favorite Ways To Serve And Side Recommendations
I like to make these quick open-face sandwiches as a lunch for my kids and me. I’ll often pair it with some in-season fruit, veggies, and avocado oil potato chips.
To make it more of a filling dinner, I often serve these tuna melts with a favorite soup, like this tomato soup or any of these delicious soup recipes.
Storing And Reheating Leftovers
I package any assembled tuna melts in an airtight container and store them in the fridge for up to 2 days. Then, to reheat one for an easy lunch, I just pop it in an oven preheated to 350℉ or in an airfryer preheated to 300℉ until it is warmed through, which usually takes about 3 minutes.

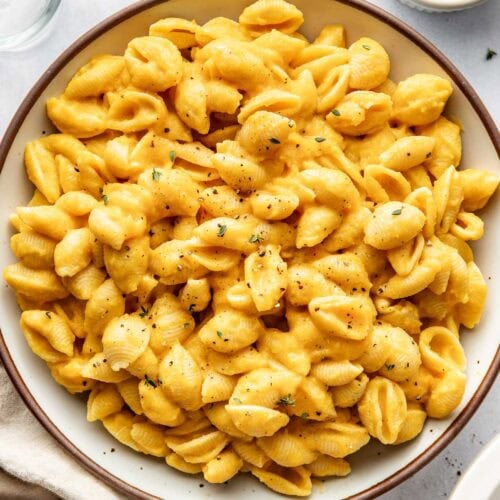
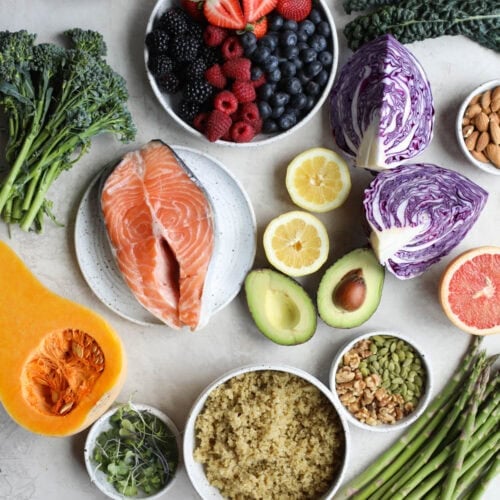
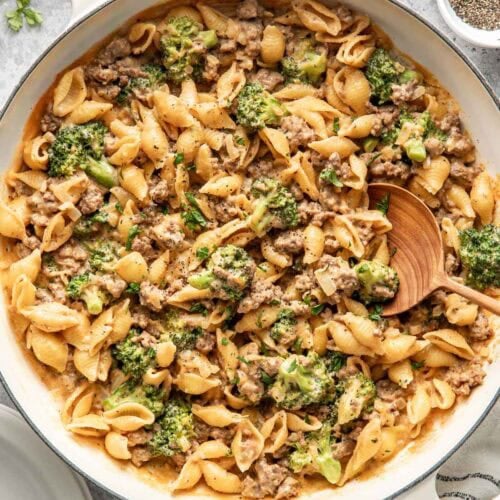
More Delicious Recipes To Try

Want to save this recipe?
Enter your email below & we’ll send it straight to your inbox. Plus you’ll get great new recipes from us every week!
Tuna Melt Recipe
Make a simple, easy, delicious, and nutritious lunch or dinner in just 10 minutes. This flavorful tuna salad tastes great when served as a tuna melt made with favorite bread, veggies, and cheese.
Ingredients
For the Tuna Salad:
- 1 (10-ounce or two 5-ounce) can(s) skip jack or albacore tuna in water
- 1 medium celery rib, finely diced (¼ cup)
- 2–3 green onions, ends trimmed and sliced thinly (¼ cup)
- ¼ cup mayonnaise
- 2 tablespoons chopped peperoncini
- 1 tablespoon peperoncini juice (from the jar)
- ¼ teaspoon black pepper
- Optional: fresh dill or finely minced parsley to taste
For the Tuna Melt:
- 4 slices bread of choice
- 1 handful (½ ounce) fresh spinach leaves
- 1 medium tomato, sliced into 8 rounds
- 4 slices cheddar, Swiss, havarti, or gruyere cheese
Instructions
- Preheat the oven broiler to High (or preheat a toaster oven on the Broil setting) and place the top rack about 6 inches below the heating element.
- In a medium bowl, combine the drained tuna, celery, green onion, mayonnaise, pepperoncini, pepperoncini juice, pepper, and (if using) the fresh dill or parsley. Add additional mayo to achieve the desired level of creaminess.
- Toast the bread slices using a toaster or by placing them under the broiler for 30-60 seconds per side or until toasted.
- Place the toasted bread slices on a baking sheet. Top each slice of bread with ¼ of the spinach, ¼ of the tuna mixture, 2 slices of tomato, and a slice of cheese.
- Slide the baking sheet under the broiler and broil for 2-3 minutes or until the cheese has melted. (See Tip below).
- Serve immediately, open faced or add an additional piece of toasted bread on top to serve as a sandwich.
- Store leftovers in an airtight container in the fridge for up to 2 days. To reheat, place the tuna melt in preheated 350℉ oven or 300℉ air fryer for 3-4 minutes or until warmed through.
Last Step! Please leave a review and rating letting us know how you liked this recipe! This helps our business thrive so we can continue providing free recipes and high-quality content for you.
Notes
The tuna salad portion can be prepared and stored in an airtight container in the fridge for up to 4 days before assembling the tuna melts.
Substitutions:
– May use plain Greek yogurt instead of mayonnaise for an egg-free version
– Try chopped banana peppers, pickled red onions, or dill pickles (and the juice from the jar) in place of the peperoncini
– May use English muffins or bagels in place of the bread (use gluten free, if needed)
– May substitute 3 ounces shredded cheese for the sliced cheese
Tip: It may be helpful to leave the oven door just slightly cracked open when the tuna melts are under the broiler. This prevents the broiler from cycling on and off, and it also makes it easier to see when the cheese has melted.
Nutrition Information
- Serving Size: 1 open-face tuna melt with cheese and veggies
- Calories: 347
- Fat: 18 g
- (Sat Fat: 5 g)
- Sodium: 588 mg
- Carbohydrate: 17 g
- (Fiber: 4 g
- Sugar: 3 g)
- Protein: 25 g
- Cholesterol: 56 mg
Dietary
Recipe Changelog
- February 2026: We previously published a version of this recipe that was tuna melt quesadillas. They were made with tuna salad, tortillas, avocado, salsa, and spices, and cooked in a skillet. Download the previous version here.
T
The photos in this blog post were taken by Rachel Cook of Half Acre House.
For ultimate success, we highly recommend reading the tips in the full blog post above. All photos and content are copyright protected. Please do not use our photos without prior written permission. If you wish to republish a recipe, please rewrite the recipe in your own unique words. Link back to the source recipe here on The Real Food Dietitians. Thank you!
Do you think you could sub salmon salad for this?
Absolutely!
Hello!
What fresh vegetables would be a good choice and complement this recipe?
These would be delicious with a simple green salad or a side of steamed or roasted green beans.
This is very good. I made it without the avocado and salsa, which I did not have. We are trying to reduce our gluten and this made a delicious gluten free lunch for us. I definitely recommend trying this recipe and I will definitely be making it again!
Do you have a chicken version of this??
Hi Melyssa, we do not have a chicken version of this particular recipe, but you could easily use cooked shredded chicken in place of the canned tuna.