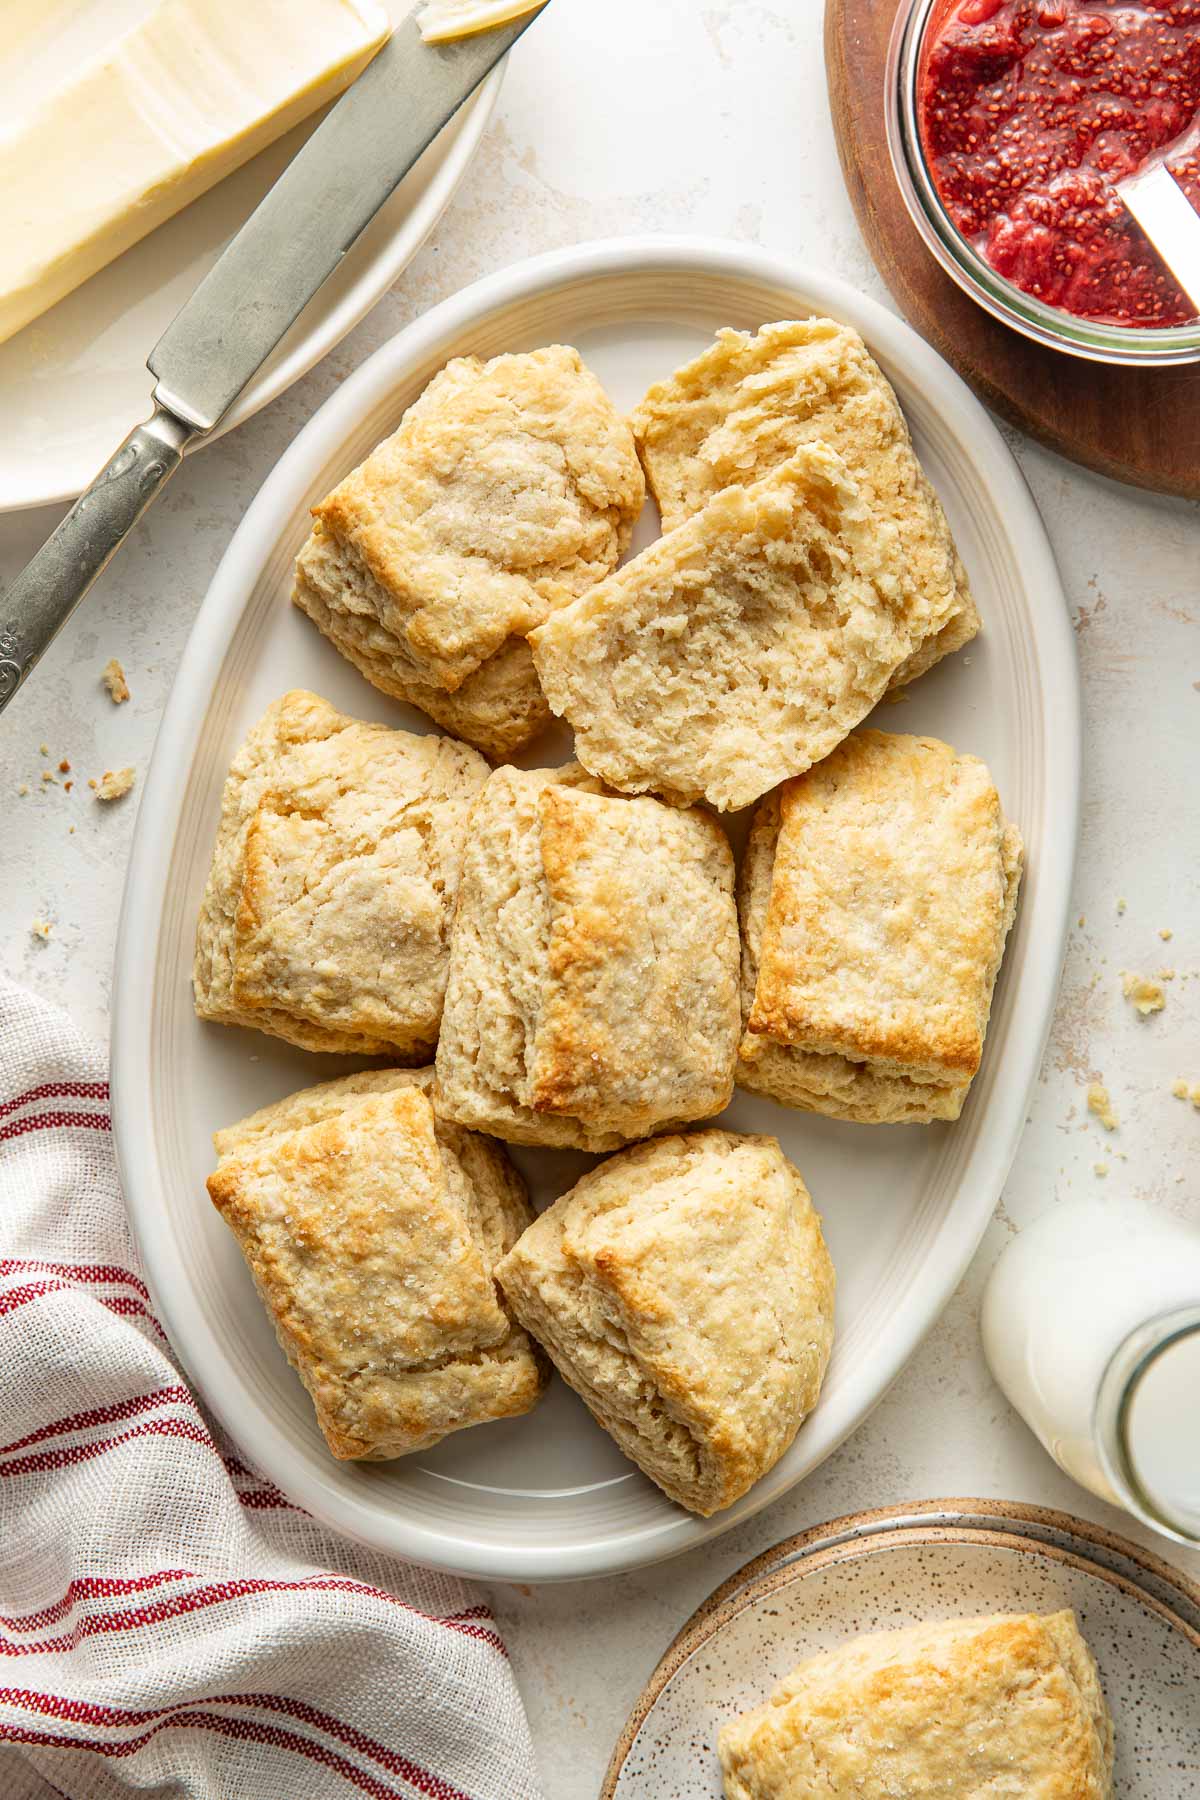
My family has always loved biscuits. Whether it’s garlic cheddar drop biscuits alongside soup, my flaky homemade buttermilk biscuits for breakfast, or sweet potato biscuits during the holidays, they rarely last long in our house. So it was only a matter of time before I created a sweet biscuit recipe, and these shortcake biscuits were an instant favorite. Delicious enough on their own, I often enjoy them with butter and jam, but their true calling is being used as the base for homemade strawberry shortcake.
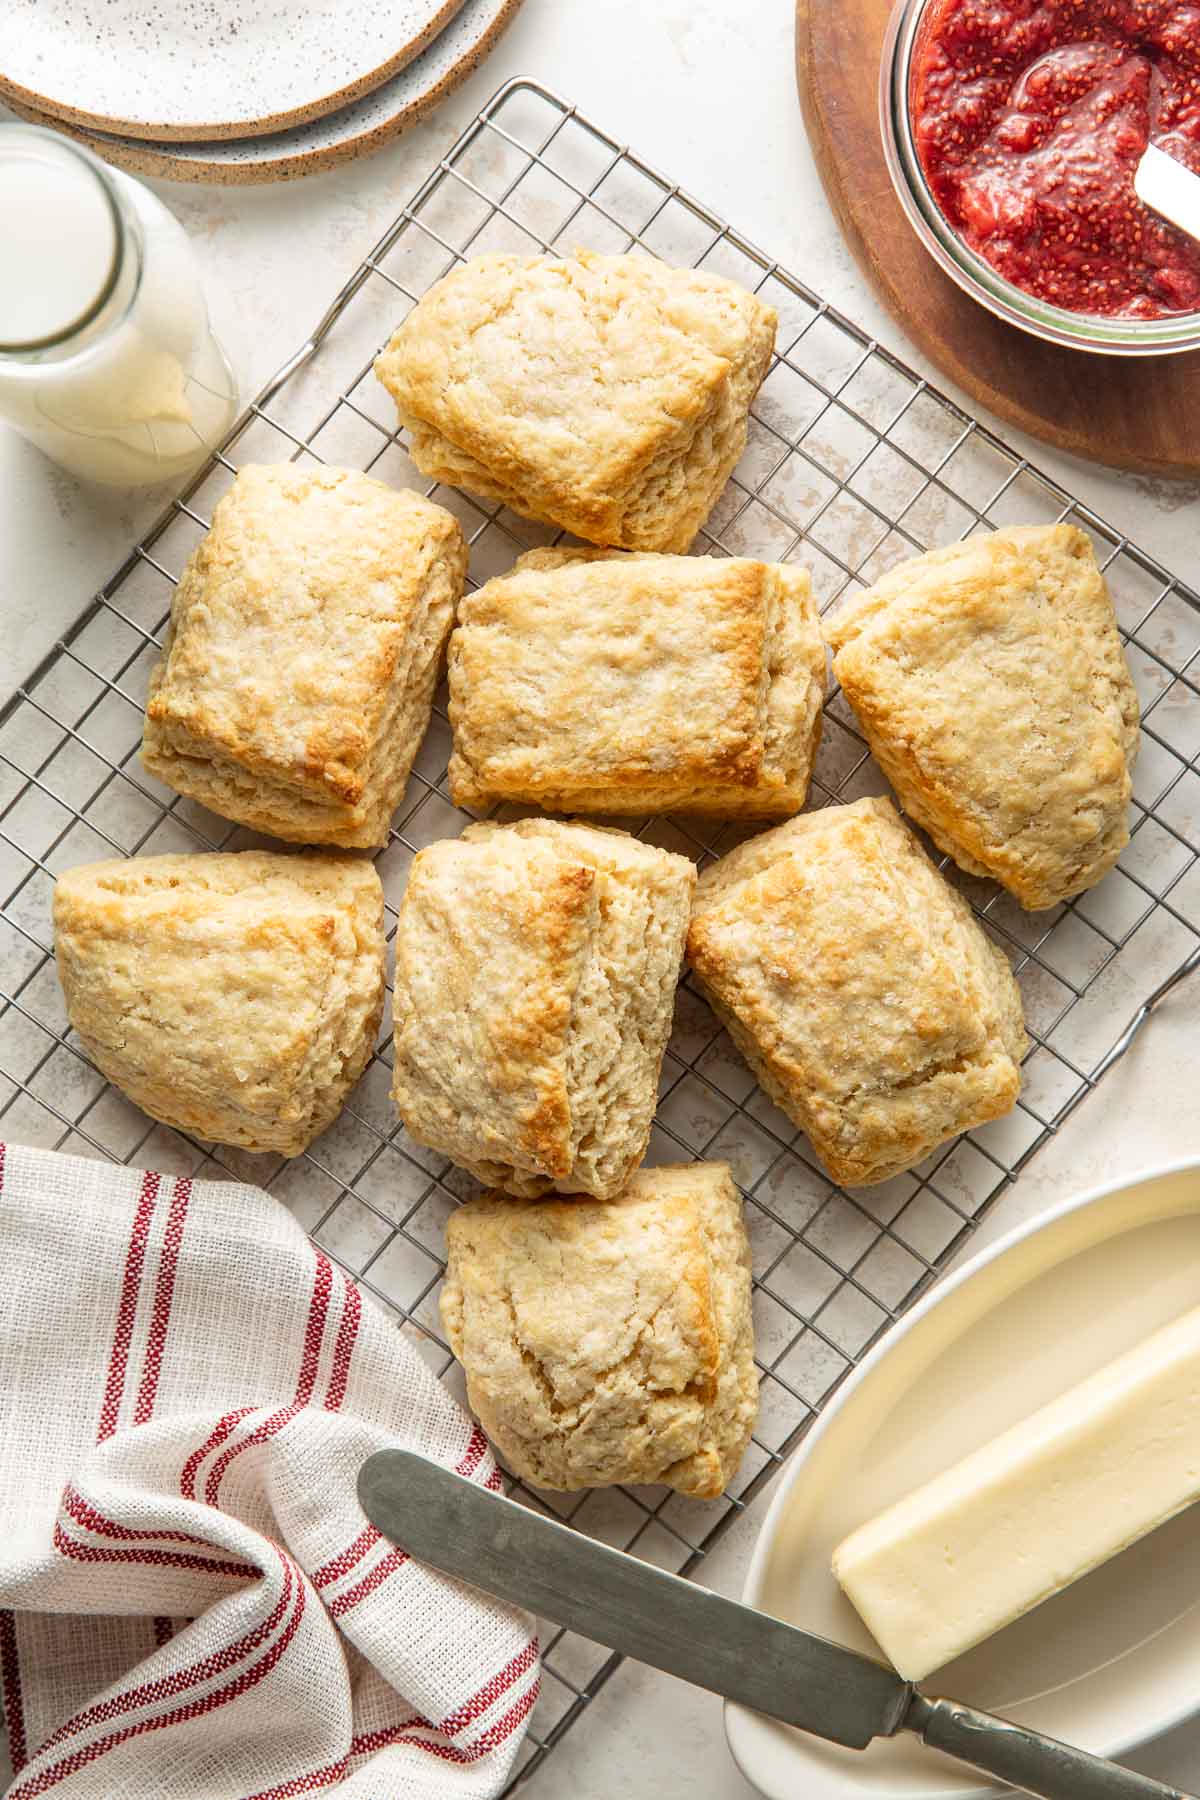
After testing several versions, I landed on this recipe using milk, vanilla, and butter for the best balance of flavor and texture. The biscuits have a lightly sweet, buttery taste with a tender crumb that’s soft enough to soak up juicy berries and whipped cream without becoming soggy. They’re simple to make with pantry staples, freezer-friendly, and perfect for everything from weekend breakfasts to summer desserts. Whenever strawberries are in season, these shortcake biscuits are one of the first things I make.
Recipe Highlights
Ready in just 30 minutes: From mixing the dough to pulling warm biscuits out of the oven, this recipe comes together quickly with simple pantry staples.
Ideal for make-ahead baking: These biscuits stay fresh for several days and freeze well, making them great to have on hand for breakfasts, snacks, or last-minute desserts.
Tender, buttery, and lightly sweet: The combination of vanilla, butter, and milk creates a soft biscuit with just the right amount of sweetness without being overly rich, similar to a scone.
Time To Gather Up The Ingredients
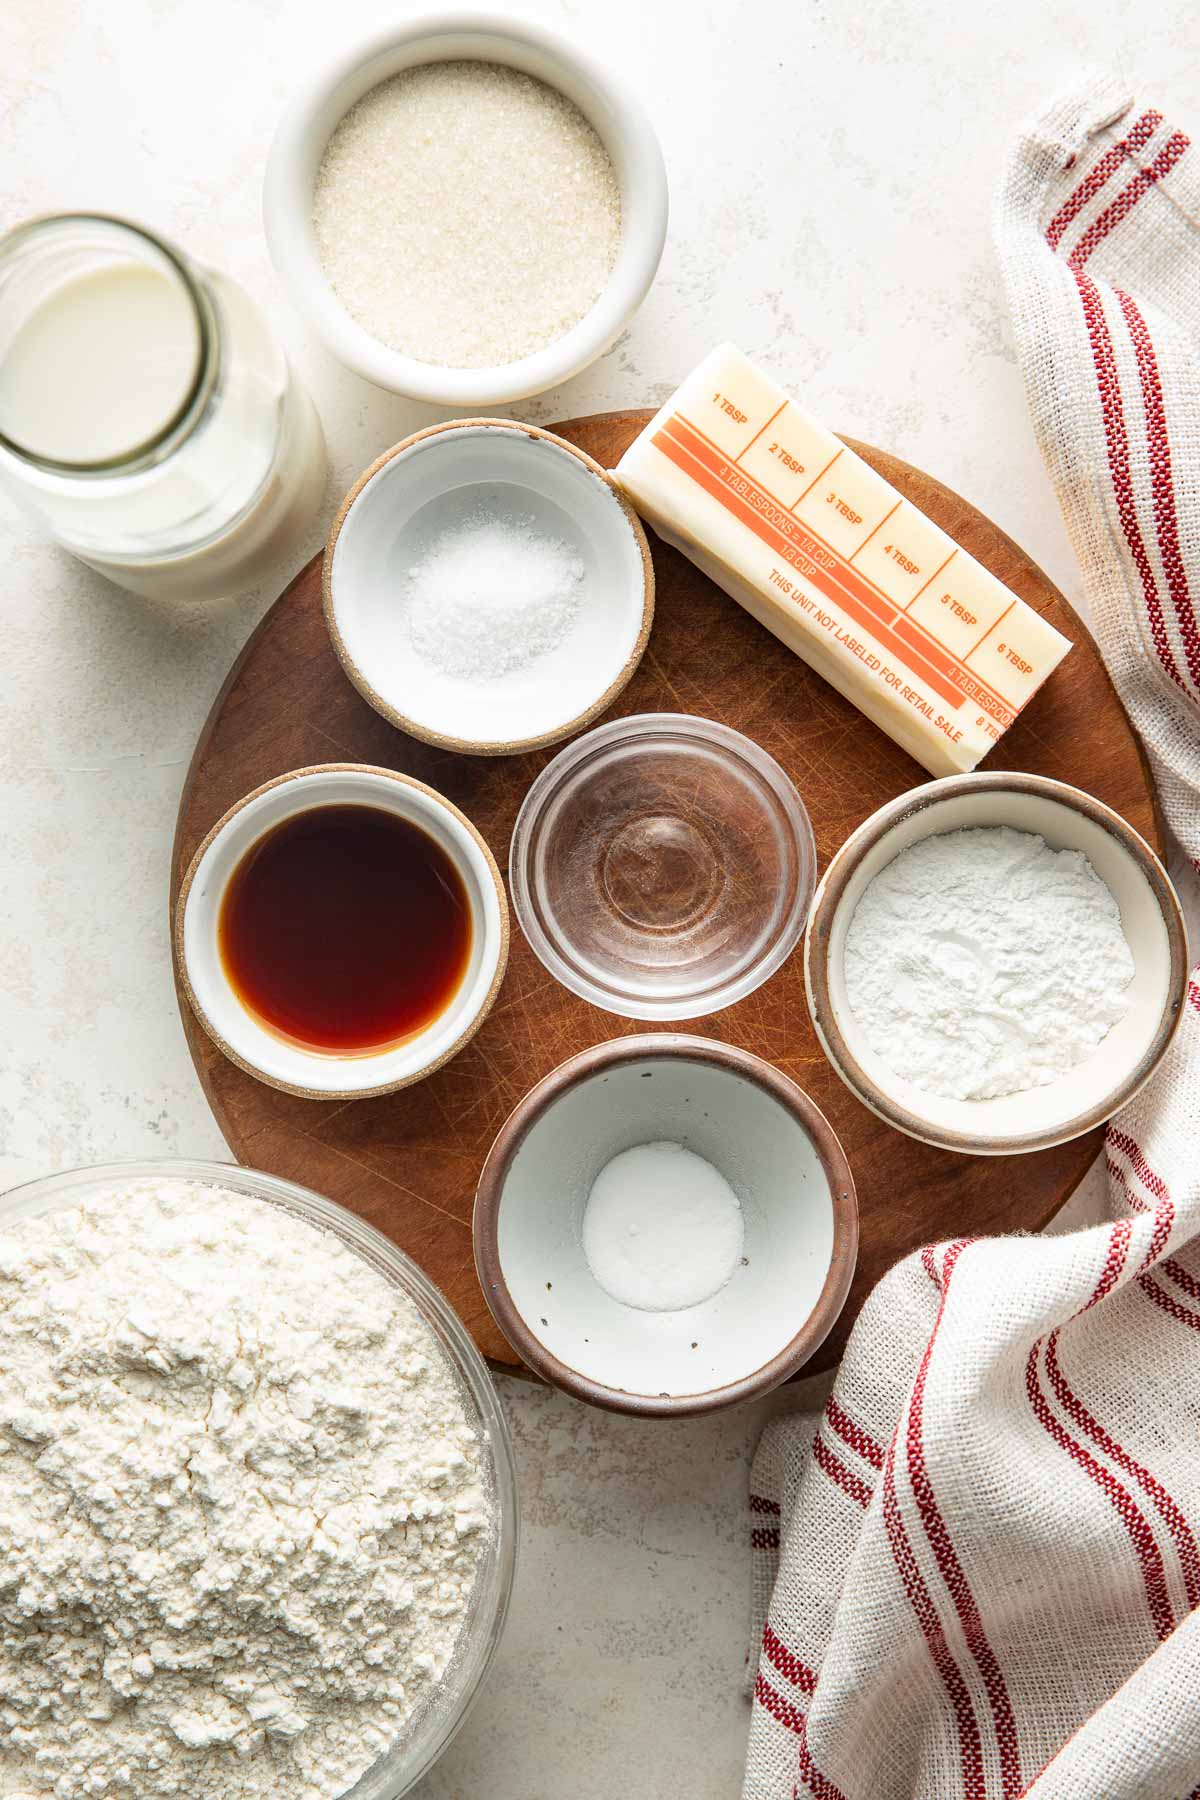
These sweet shortcake biscuits are incredibly simple and come together with just a handful of simple ingredients I almost always have on hand. Here are my notes about the key components:
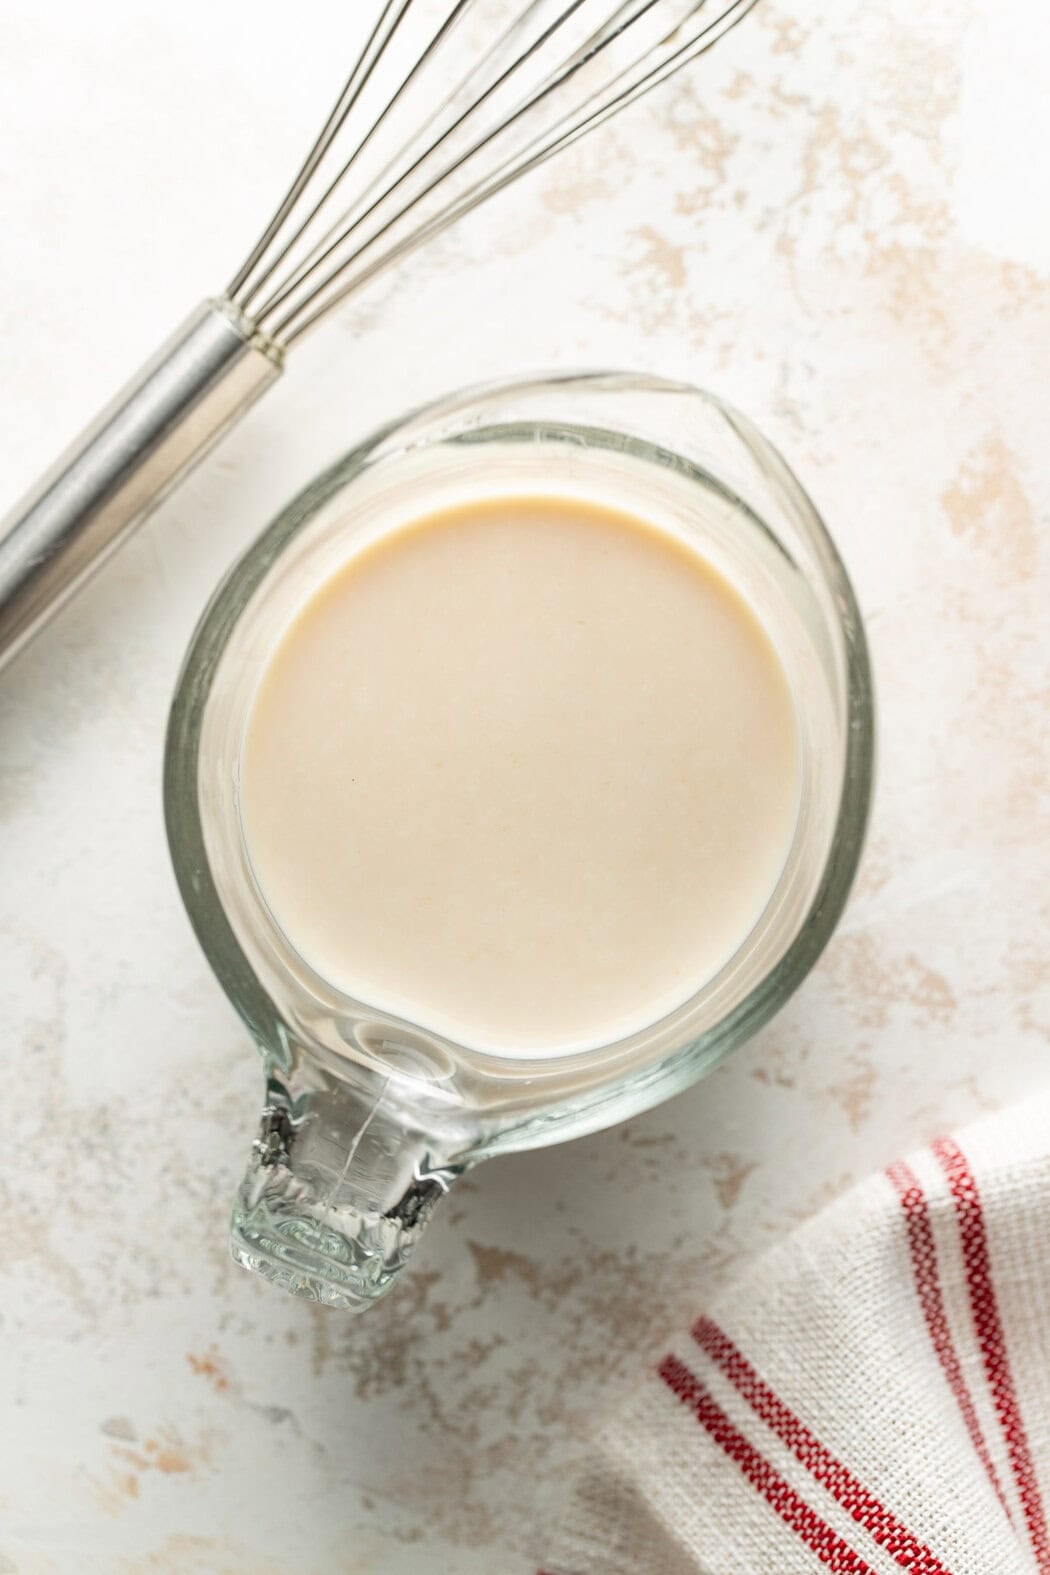
- Vanilla buttermilk mixture: This simple combination of whole milk or 2% milk, pure vanilla extract, and white vinegar creates a homemade buttermilk substitute that adds moisture, tenderness, and subtle vanilla flavor to the dough. For the best results, use pure vanilla extract rather than imitation vanilla.
- All-purpose flour: Flour provides the structure for these biscuits while still allowing for a tender crumb. Measure carefully by spooning the flour into the measuring cup and leveling it off to avoid dense biscuits.
- Cane sugar: A small amount of cane sugar adds sweetness and helps the biscuits develop a lightly golden exterior. I also like to sprinkle a little extra on top before baking for extra sweetness and a subtle crunch.
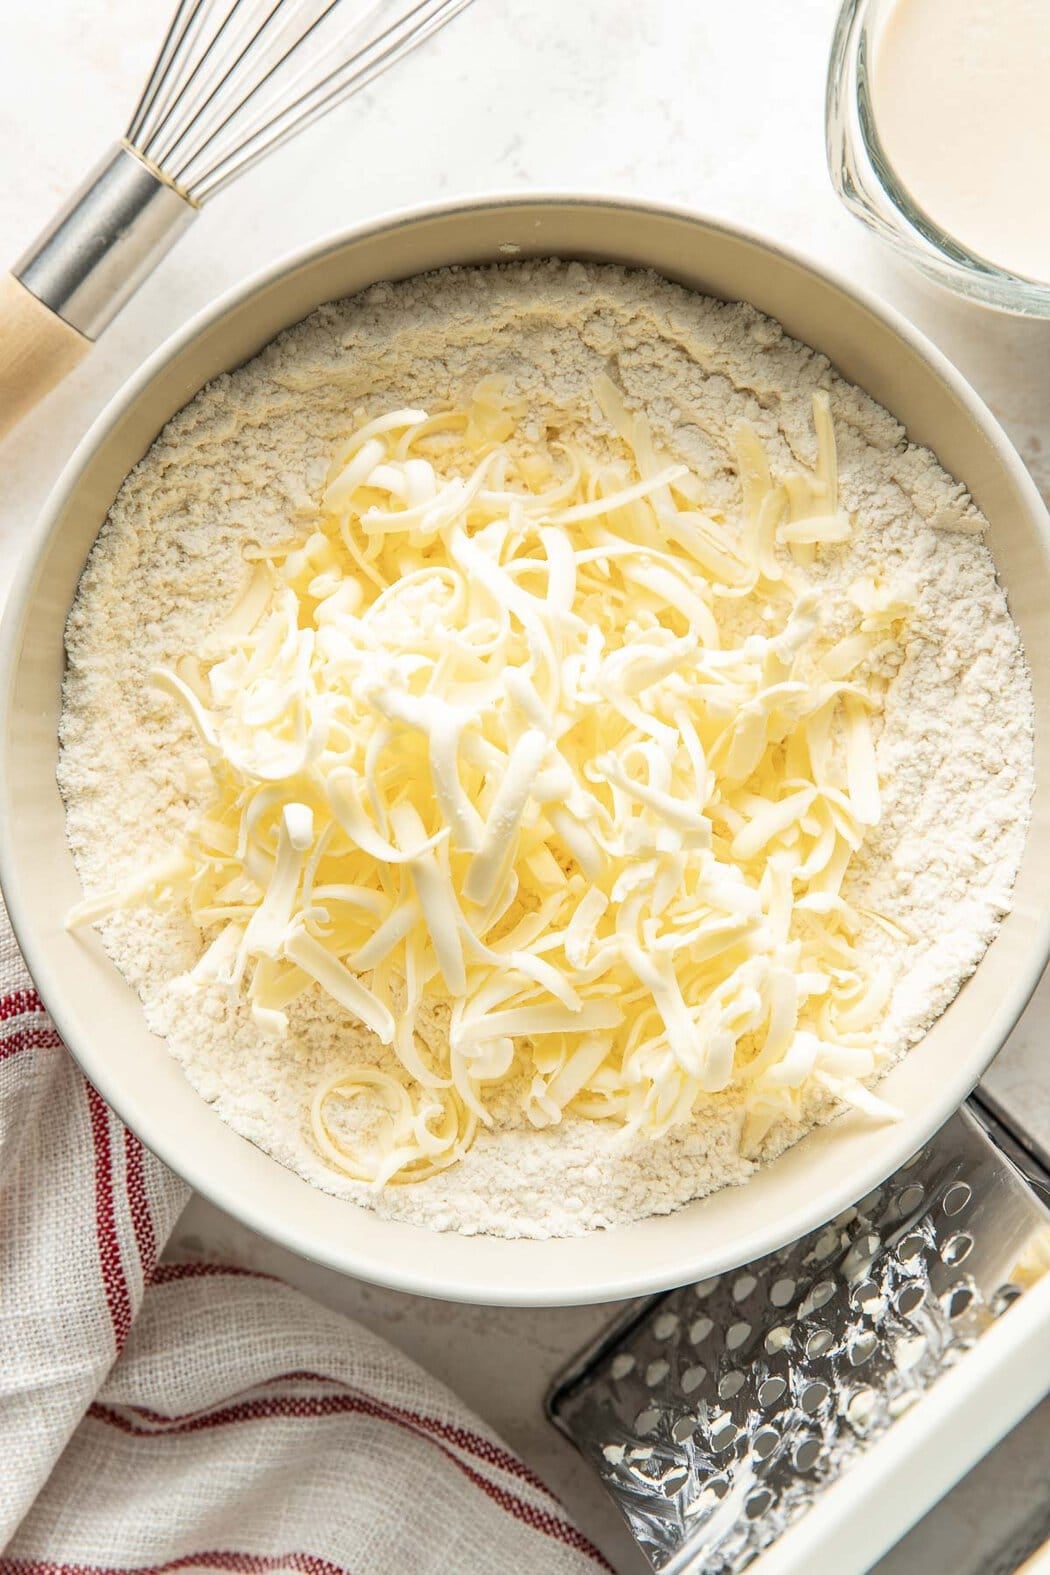
- Unsalted butter: Cold butter is the key to flaky, tender layers. I have found that grating the butter makes it easy to distribute throughout the dough, creating small pockets of steam as the biscuits bake.
- Baking staples: Baking powder, baking soda, and salt work together to create tall, fluffy biscuits with great flavor. Make sure the baking powder is fresh, as expired leavening agents can prevent the biscuits from rising properly.
Find the ingredient list with exact measurements in the recipe card below.
Equipment To Have On Hand
These are the tools I use to make perfect sweet cream biscuits every time:
- Measuring cups and spoons: For accurately measuring the ingredients and ensuring consistent results.
- Mixing bowls: I use a few bowls for preparing the vanilla buttermilk mixture and mixing the dough.
- Whisk: To combine the dry ingredients evenly and eliminate any lumps.
- Box grater: Grating the cold butter helps distribute it evenly throughout the dough, creating tender, flaky layers.
- Pastry blender or fork: Useful for working the butter into the flour mixture until it resembles coarse crumbs.
- Bench scraper or sharp knife: For shaping the dough, tidying the edges, and cutting the biscuits into even squares.
- Baking sheet: A standard rimmed baking sheet provides plenty of room for the biscuits to bake evenly.
- Parchment paper: Prevents sticking and makes cleanup easier.
- Wire cooling rack: Allows the biscuits to cool properly while maintaining their texture.
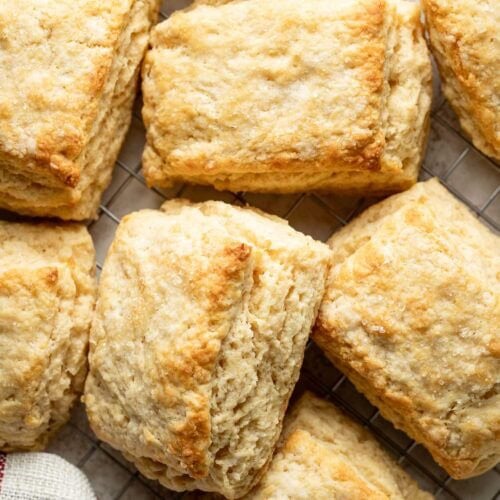
How To Prep And Bake Sweet Cream Biscuits
Here’s an overview of how I prepare these shortcake biscuits:
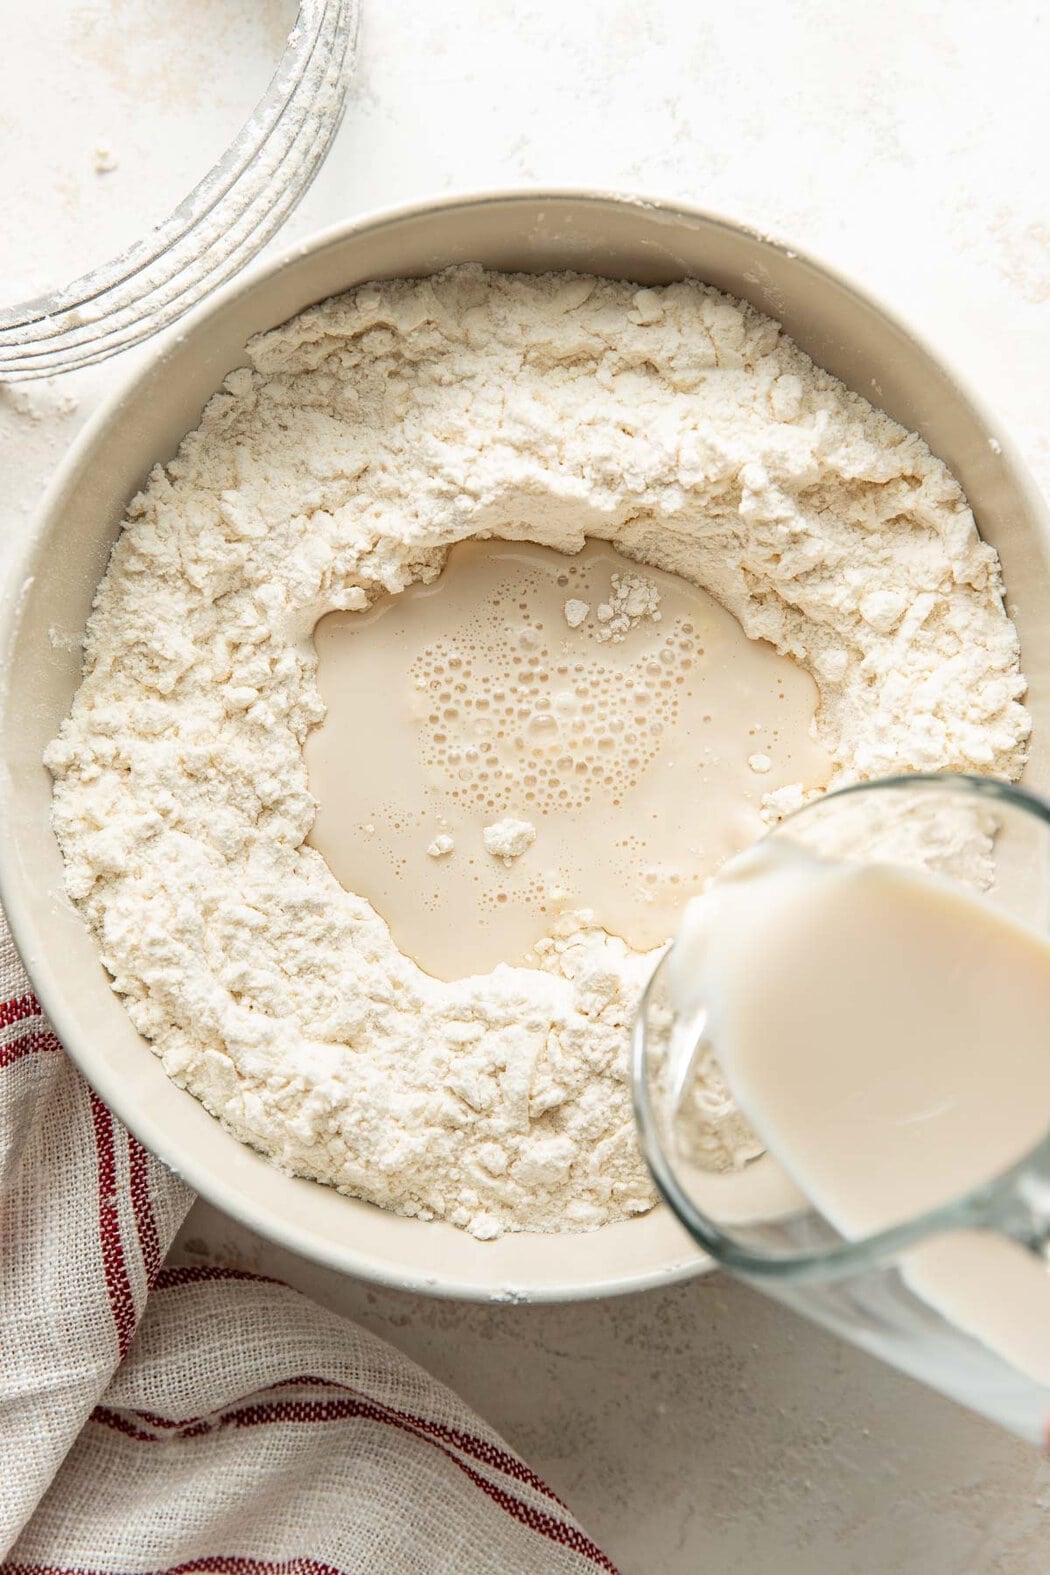
- Make the ‘buttermilk’ – Combine the milk, vanilla, and vinegar in a liquid measuring cup, and set the mixture aside to curdle. This isn’t a true buttermilk, but it acts similar to buttermilk in the recipe.
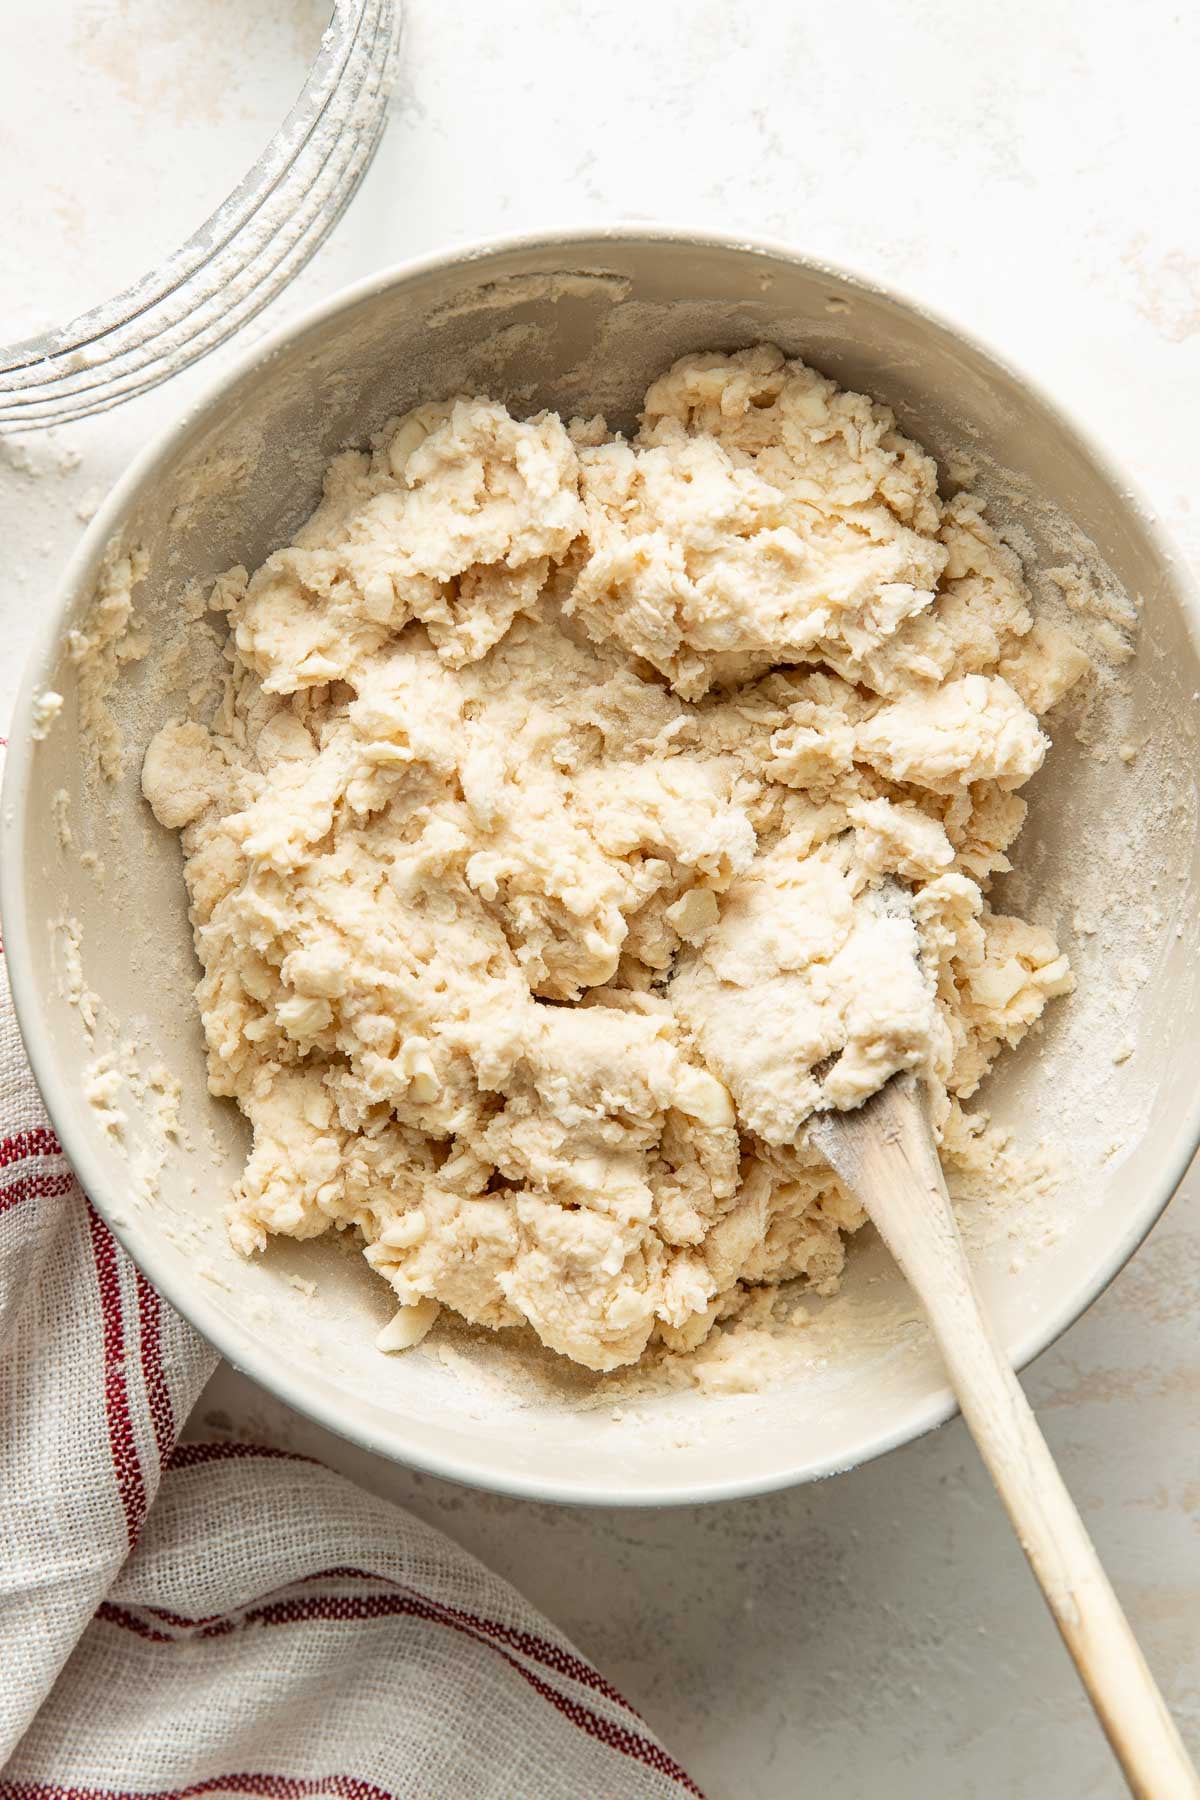
- Combine the dry ingredients – Whisk the dry ingredients quickly in a bowl with a fork, whisk, or spatula. There’s no need for an electric mixer. Then, grate the cold butter into the flour mixture and toss the shreds to lightly coat them with flour. Using a fork or pastry cutter, I work the grated butter into the flour mixture until it resembles coarse crumbs or sand. I always avoid using my hands, since it adds too much heat and causes the butter to melt, which leads to dense biscuits.
- Combine the dough – Make a well in the center of the flour mixture, pour in the vanilla buttermilk mixture, and stir just until a soft craggy dough forms.
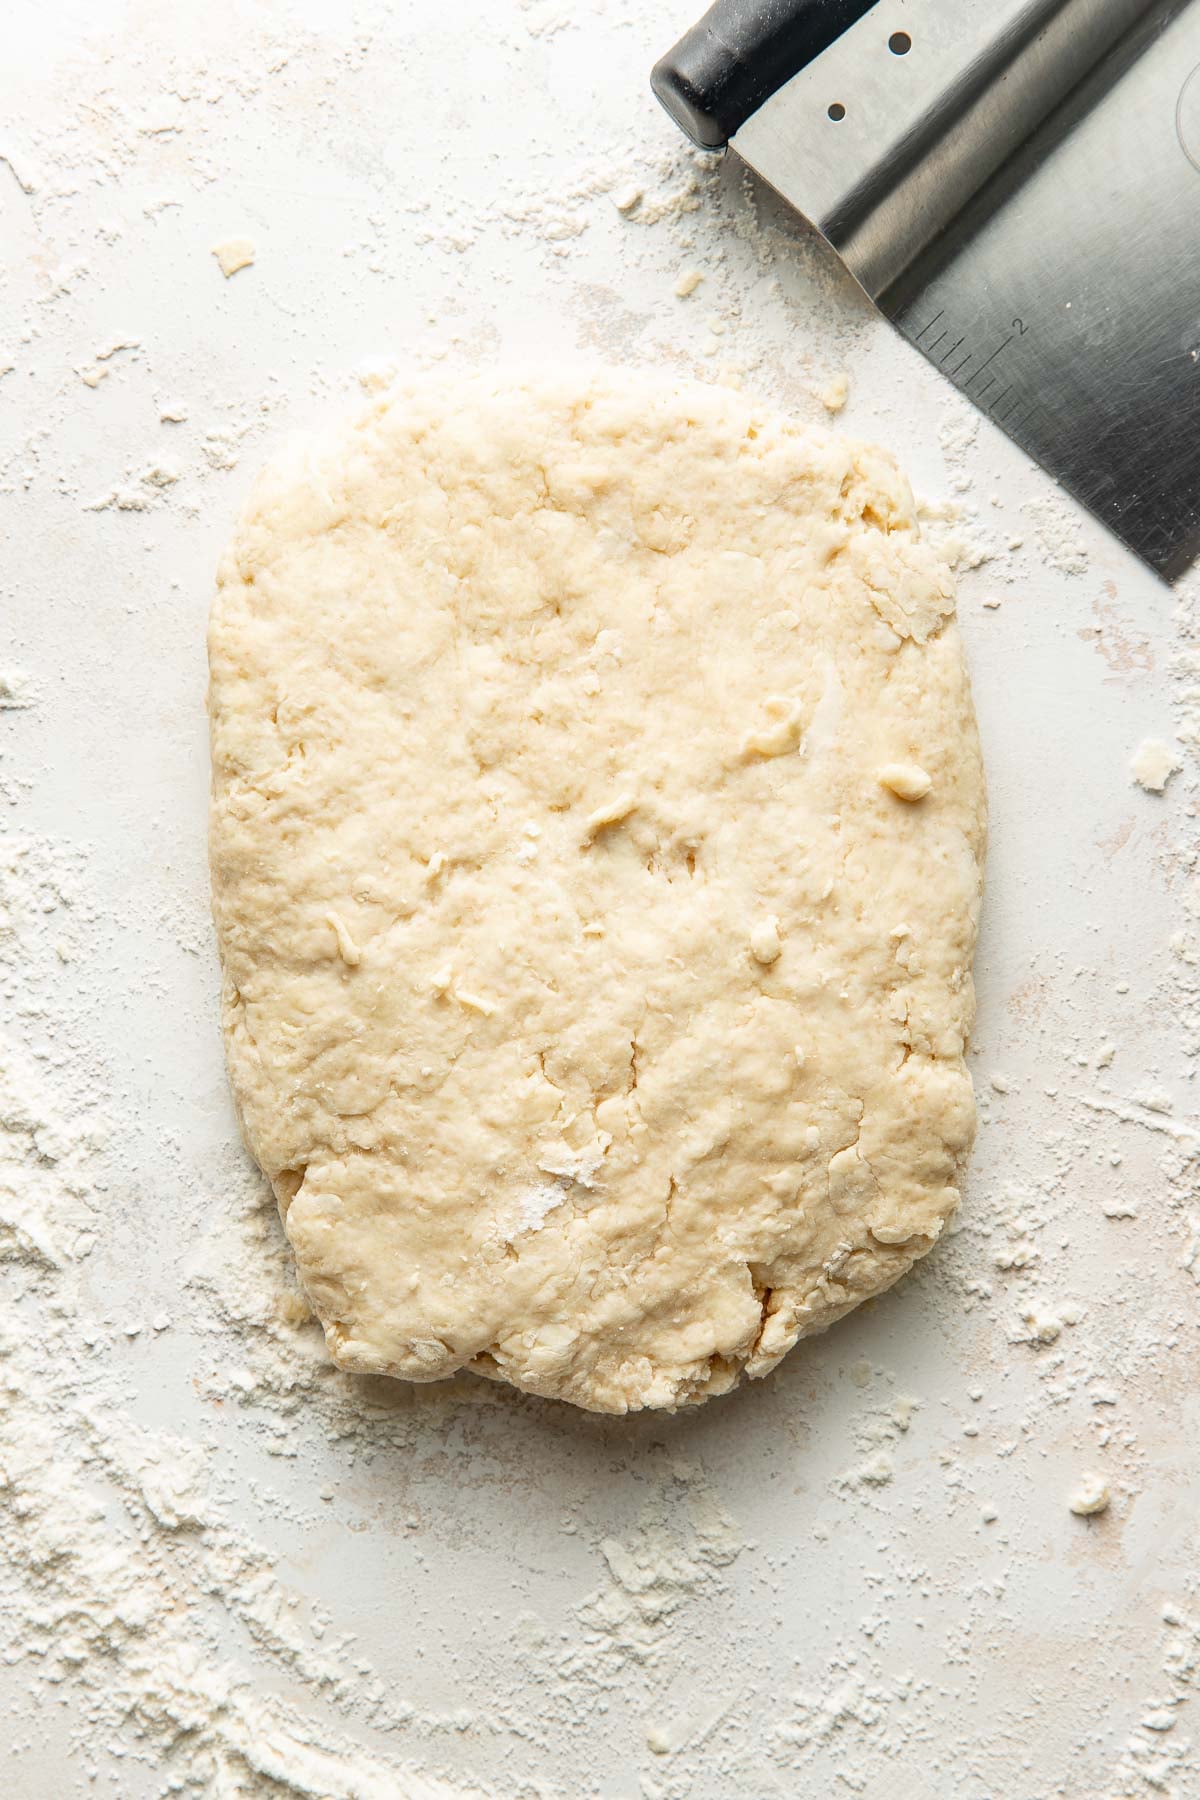
- Shape the dough – Turn the dough and any loose bits onto a lightly floured surface, and pat it into a rectangle. Fold the rectangle in half like a book, then press it into a rectangle again. A light laminating process, this creates layers of fat, which contribute to light, flaky biscuits. Repeat the process 3 more times, making sure to incorporate all the flour into the dough.
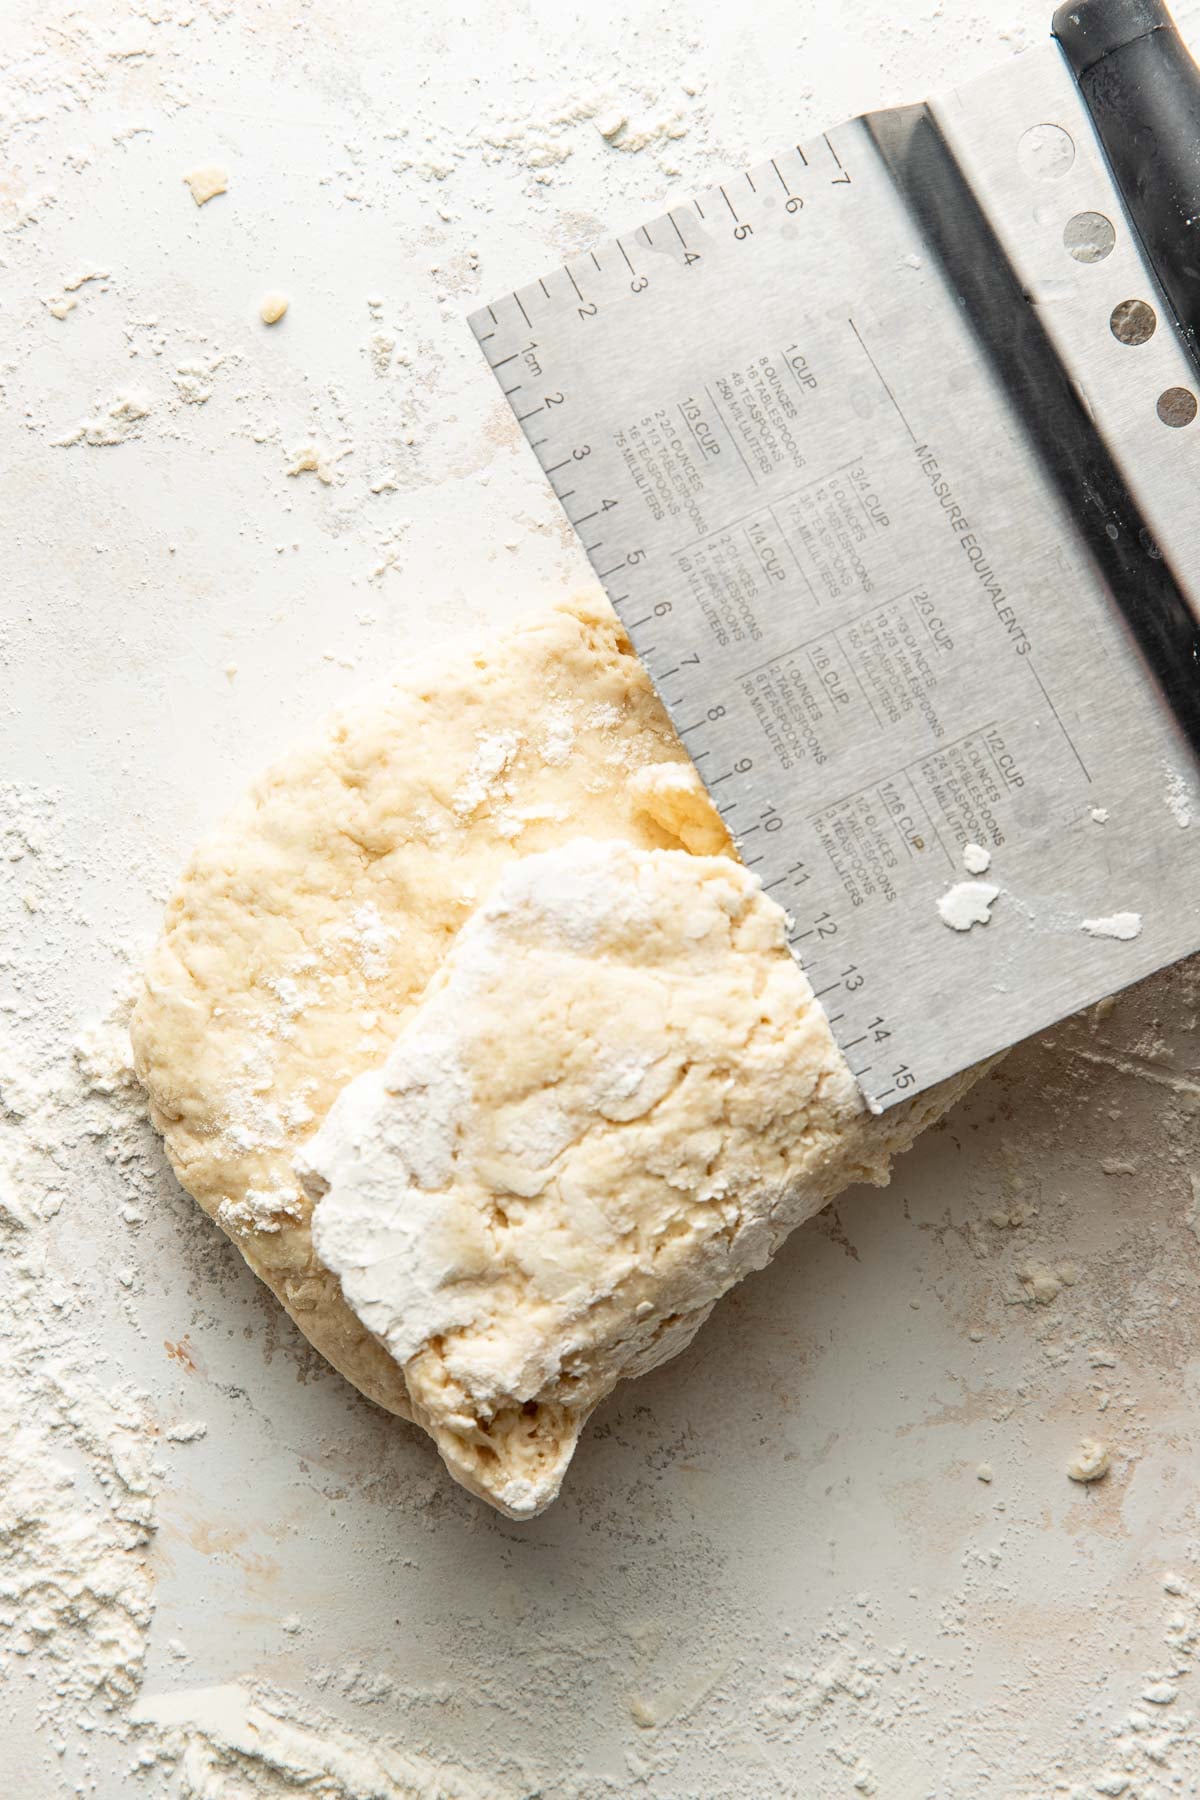
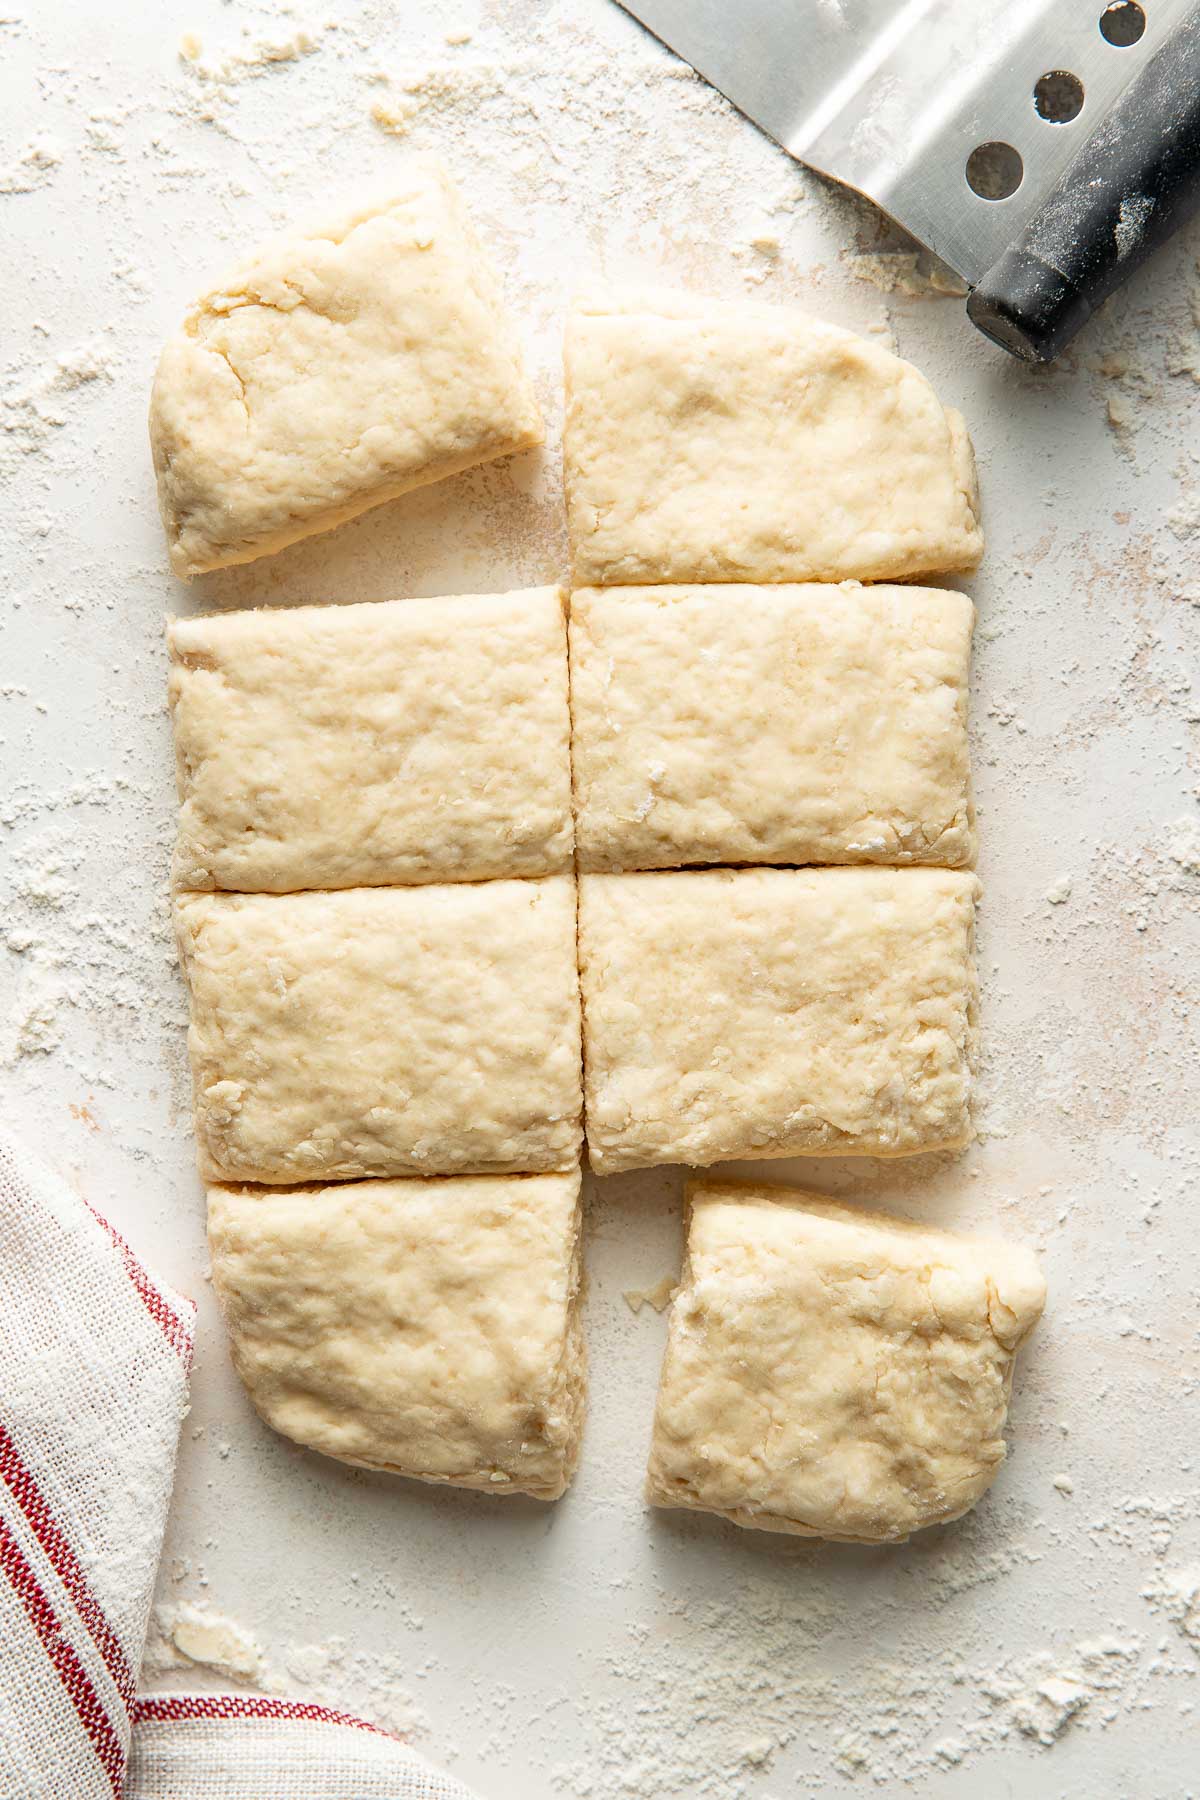
- Cut the biscuits – Shape the dough into a rectangle one more time, making the edges tidy. I like to use a bench scraper for this. Then, cut the dough into 8 equal-sized squares. Or, use a biscuit cutter to create perfect circles.
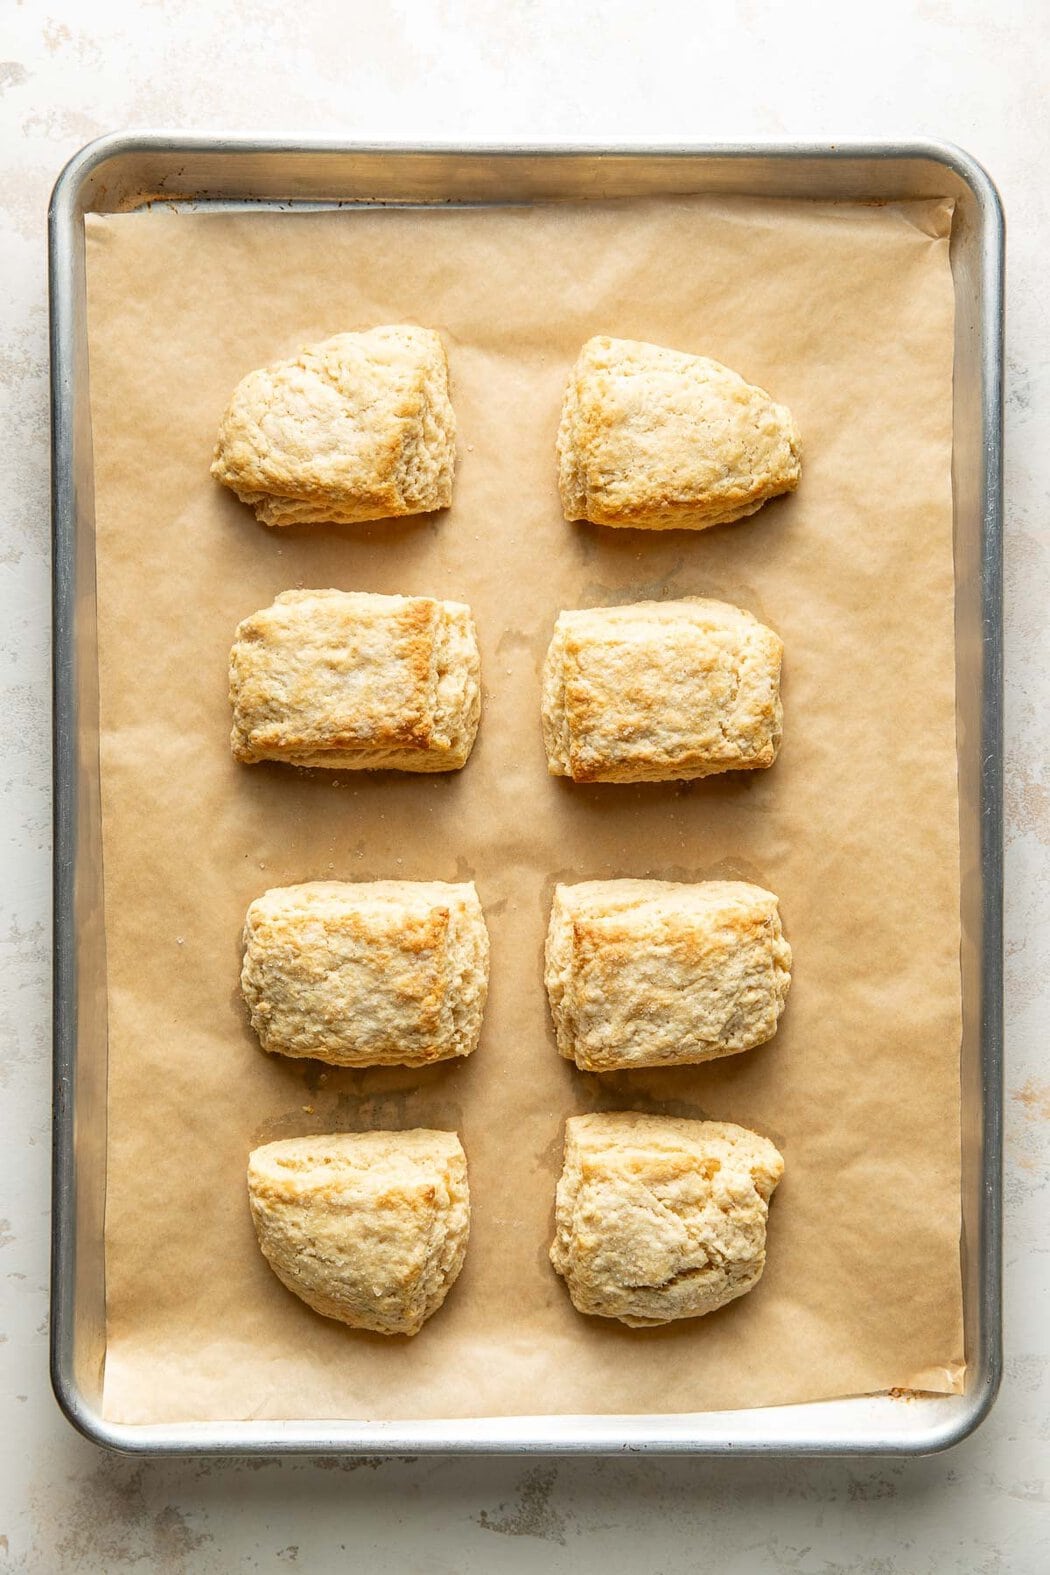
- Bake – Arrange the biscuits on a baking mat or parchment paper-lined baking sheet, and sprinkle the tops with sugar. Then, bake in the preheated oven just until the tops and bottoms are very lightly golden brown, and the edges are just beginning to turn crispy. This usually takes 10 to 12 minutes, but every oven is different. So, keep a close eye on the biscuits, and adjust the baking time as needed.
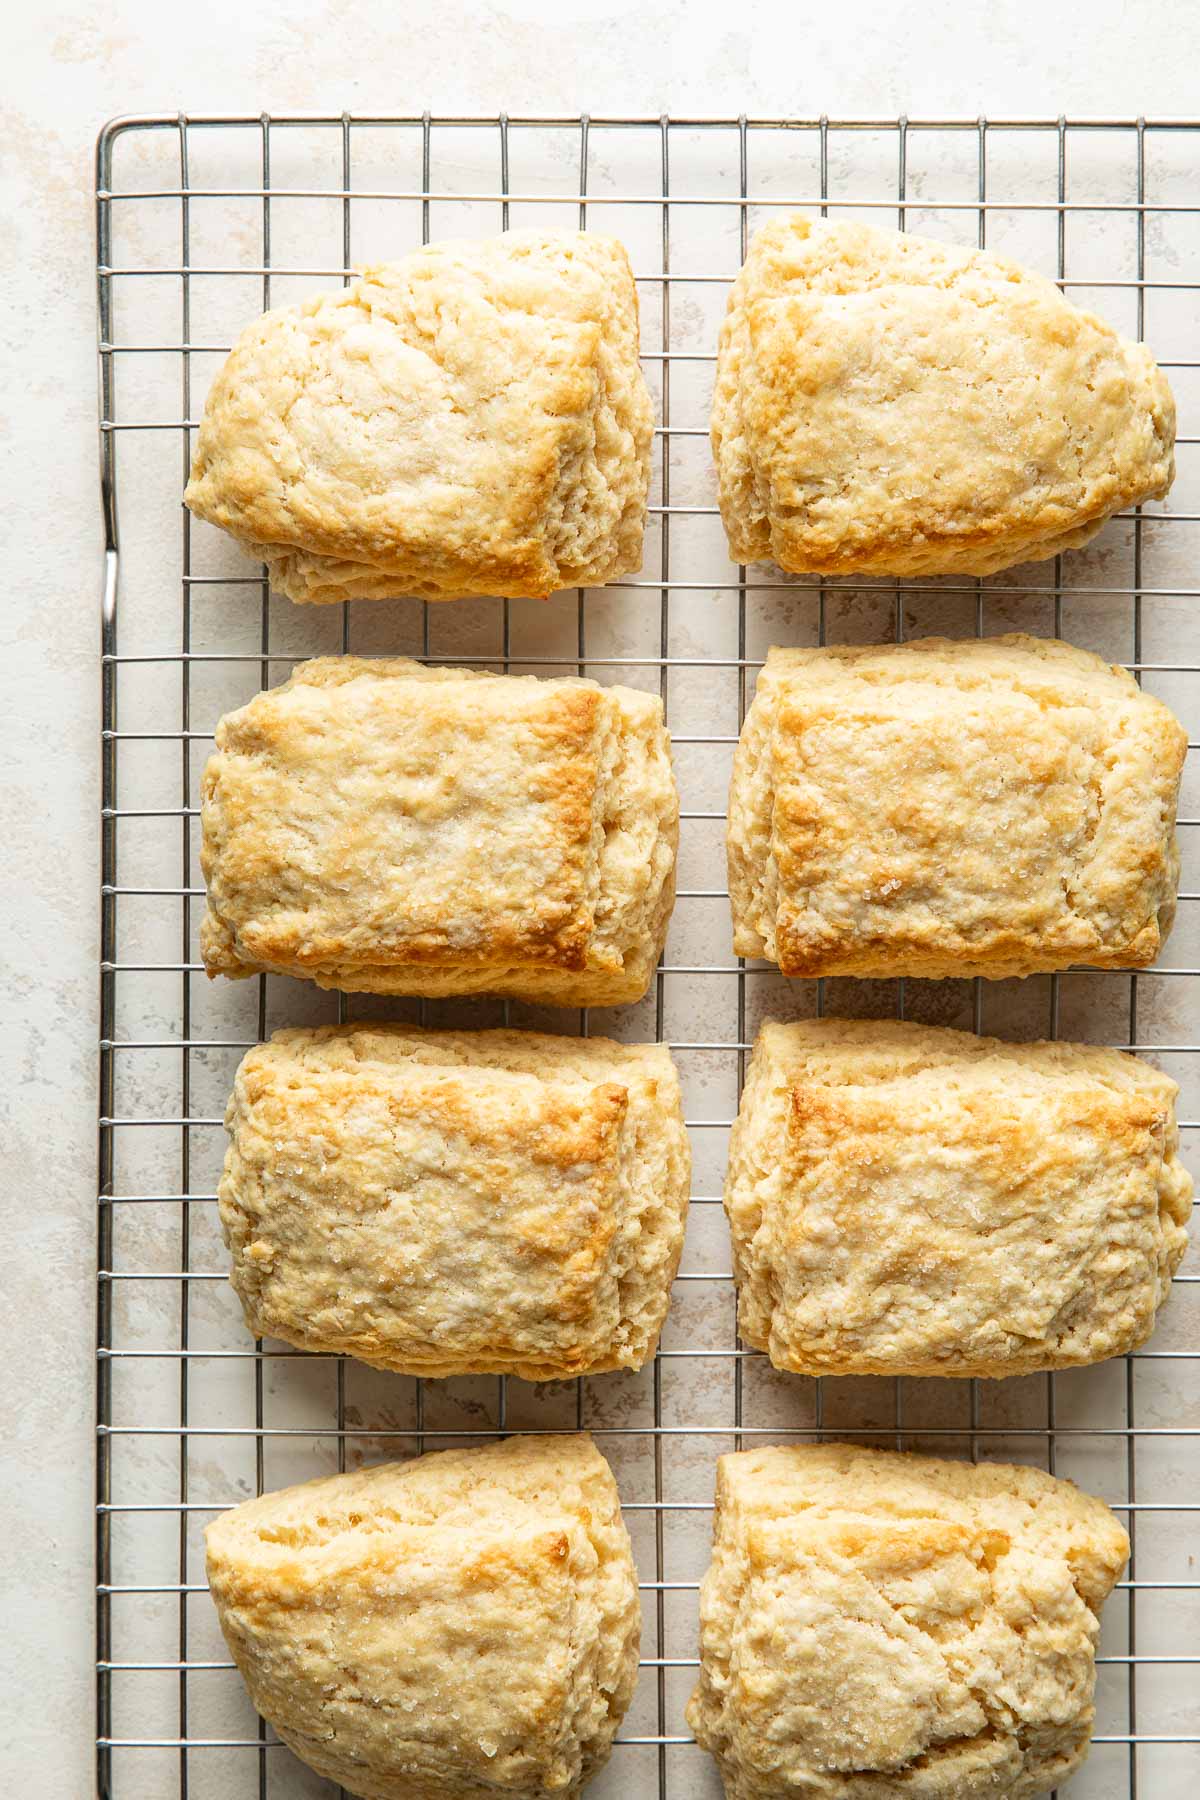
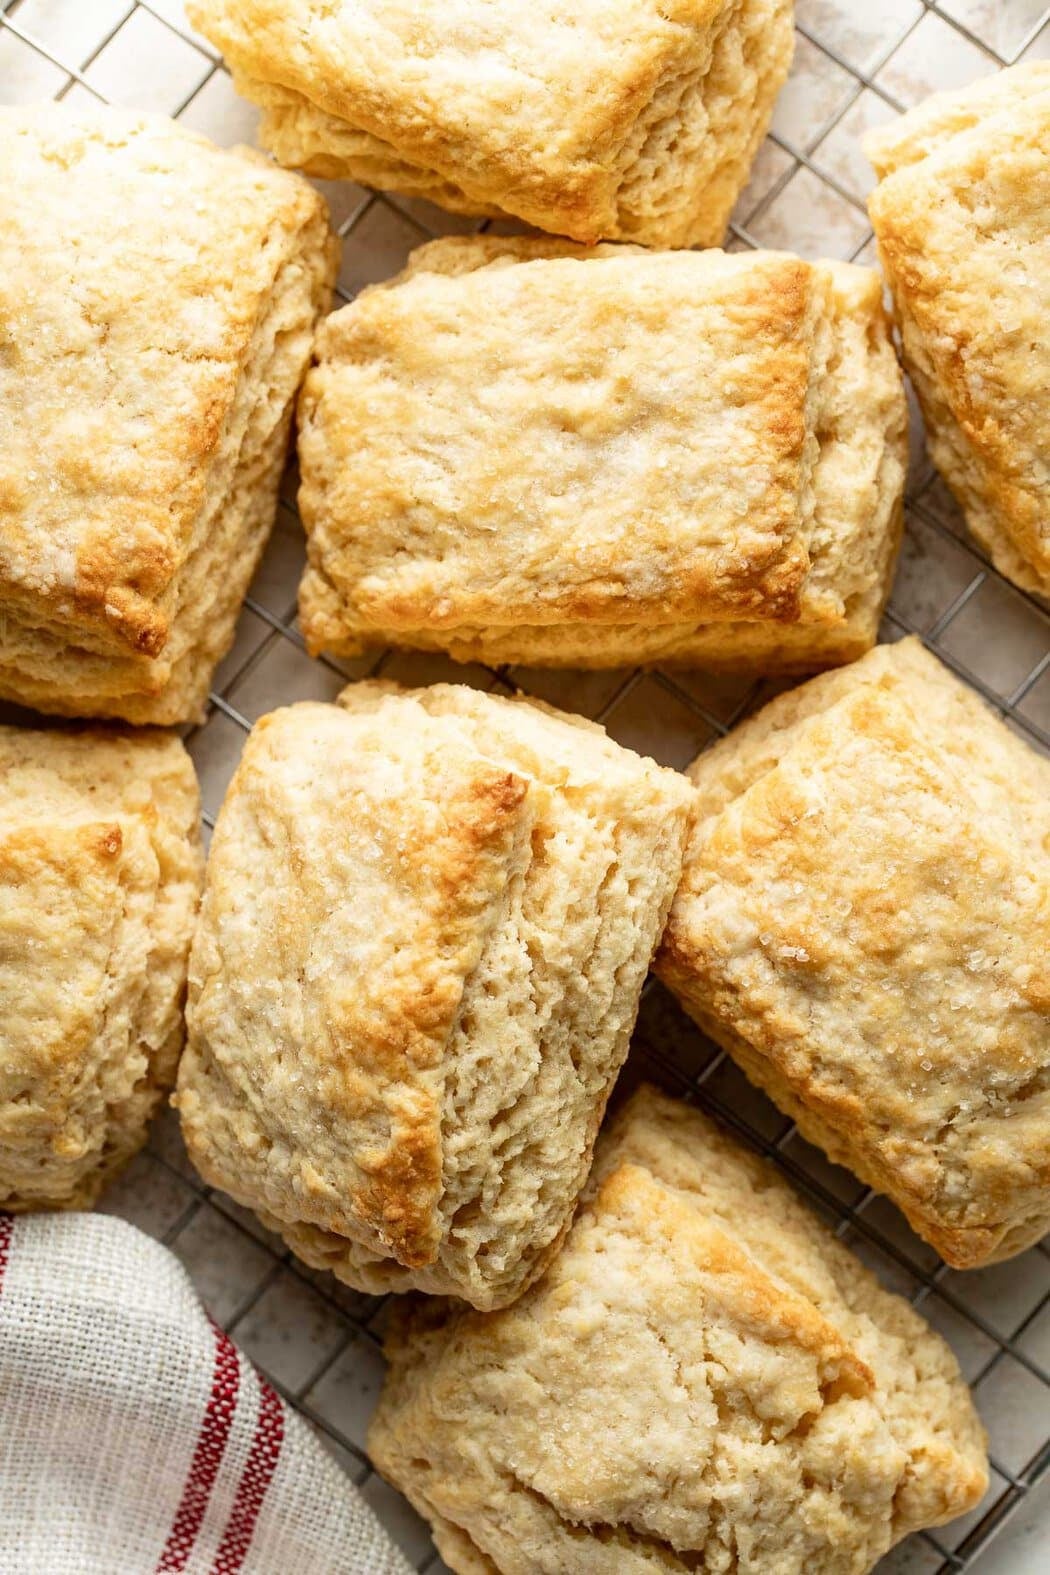
- Cool and serve – Let the baked biscuits cool on the pan slightly. Then, transfer them to a wire rack to cool completely. This allows the biscuits to fully set and prevents them from becoming soggy or overly crumbly. Enjoy them at room temperature, or warm them again before serving.
For serving size and the complete directions and ingredient amounts, scroll down to the recipe card below. All of our recipes include the nutrition analysis, listing calories (kcals), protein, carbohydrates/carb, fiber, sugar, sodium, cholesterol, and more per serving.
Make These Gluten Free
For gluten-free biscuits, substitute the all-purpose flour with a 1:1 all-purpose gluten-free flour blend. Bob’s Red Mill Gluten-Free 1:1 Flour is my go-to gluten-free flour, but any brand should work. I recommend weighing the flour for the best results.
Serve With Jam, Jelly, Or As Strawberry Shortcake
These sweet cream biscuits are delicious served warm or at room temperature with a little softened homemade butter and jam or jelly. I especially enjoy them with chia seed jam, raspberry preserves, or a drizzle of honey alongside a cup of good quality coffee or tea.
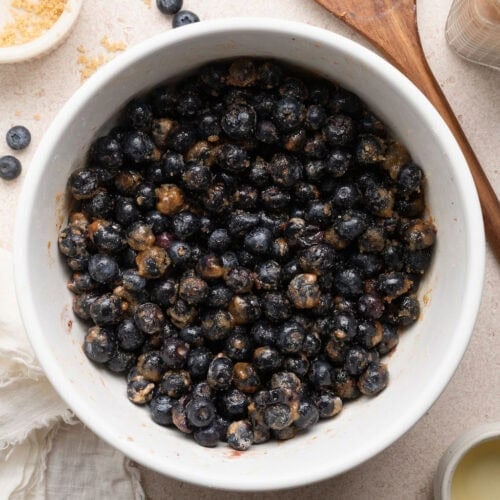
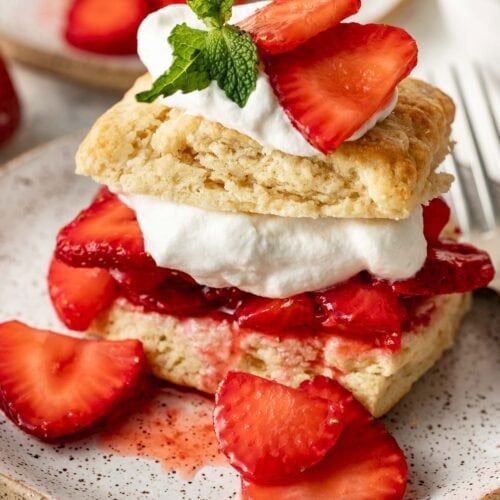
While the biscuits are wonderful on their own, their true calling is making strawberry shortcake. I use them in place of drop biscuits, sponge cake, shortbread, or pound cake. For the best strawberry shortcake recipe, split the biscuits in half and pile them high with juicy macerated strawberries and freshly whipped cream for a simple summer dessert that’s always a crowd-pleaser. For an extra-special touch, toss the strawberries with a little maple syrup and let them sit for a few minutes to become sweet and syrupy before serving.
I’ve also used these biscuits as the base for other fruit shortcake dessert recipes. Instead of fresh strawberries, try them with peaches, blueberries, blackberries, or a combination of seasonal berries and a sprinkle of granulated sugar, a dollop of whipped cream, or vanilla ice cream.
Store At Room Temp Or Freeze
These biscuits disappear quickly in my home. So, I simply transfer leftovers to an airtight container and store them at room temperature for up to 3 days. For longer storage, they will keep fresh in the freezer for up to 3 months. To freeze, let the biscuits cool completely, transfer them to a large zip-top bag, and squeeze out all excess air before storing in the freezer.
Reheating Leftovers
To serve frozen biscuits, thaw them at room temperature. Then, gently reheat them in the oven or toaster oven at 325℉ for just a few minutes to revive their texture and enhance the delicate flavor of the vanilla and butter.

Want to save this recipe?
Enter your email below & we’ll send it straight to your inbox. Plus you’ll get great new recipes from us every week!
Sweet Cream Biscuits Recipe
Rich and subtly sweet with a tender, flaky consistency, this shortcake biscuit recipe is perfect for serving with breakfast or making favorite desserts. With minimal ingredients and a simple dough, it’s beginner-friendly and quick to prepare.
Ingredients
For the Vanilla Buttermilk:
- ¾ cup whole milk or 2% milk
- 2 teaspoons pure vanilla extract
- ½ teaspoon white vinegar
For the Biscuits:
- 2 cups all-purpose flour (265 g)
- ¼ cup granulated sugar (60 g), plus more for topping
- 1 tablespoon + 1 teaspoon baking powder
- ½ teaspoon baking soda
- ½ teaspoon fine salt
- 6 tablespoons cold unsalted butter
Instructions
- Preheat the oven to 400℉. Line a baking sheet with parchment paper and set aside.
- To make the vanilla buttermilk, in a glass measuring cup, combine the milk, vanilla extract, and vinegar. Stir well and set aside.
- To a medium bowl, add the flour, sugar, baking powder, baking soda, and salt; whisk together to combine.
- Using a box grater, grate the cold butter into the flour mixture then toss the butter shreds lightly with the flour to coat.
- Use a fork or pastry blender to work the grated butter into the flour mixture until it resembles coarse crumbs. Avoid using your hands as this causes the butter to melt and will not give you the fluffiest biscuits.
- Make a well in the center of the flour mixture. Pour the buttermilk mixture into the well and stir until a soft, craggy dough forms.
- Turn the dough and any loose bits of flour out onto a lightly floured surface.
- Use your hands to pat the dough into a rectangle that is 1-inch thick.
- Working quickly, fold the rectangle of dough in half like a book, then press it into a rectangle again.
- Repeat this fold and press process 3 more times (for a total of 4 folds and presses). By now all of the flour should be incorporated into the dough but the dough won’t be perfectly smooth (and that’s okay!)
- Shape the dough once again into a rectangle that is 1-inch thick. This is the final shaping. Use your hands or a bench scraper to help make the edges tidy.
- Use a bench scraper or sharp knife to cut the dough into 8 squares making one cut lengthwise then 3 cuts width-wise.
- Arrange the biscuits on the baking sheet about 1 inch apart. Sprinkle a little sugar on top of the unbaked biscuits.
- Bake until the tops and bottoms are a very light golden brown, 10 to 12 minutes.
- Remove the biscuits from the oven and transfer to a wire cooling rack.
- Serve at room temperature with butter, jam (try this homemade chia seed jam) or use to make strawberry shortcake.
- Store leftover biscuits in an airtight container on the counter for up to 3 days. Cooled biscuits may be tightly wrapped in foil or plastic wrap and frozen for up to 3 months.
- Lightly toast sliced biscuits in the toaster or 375℉ toaster oven for a few minutes to refresh before enjoying. If frozen, allow to thaw at room temperature before toasting and serving.
Last Step! Please leave a review and rating letting us know how you liked this recipe! This helps our business thrive so we can continue providing free recipes and high-quality content for you.
Notes
For gluten-free biscuits, use an equal amount of 1:1 all-purpose gluten-free flour blend.
Nutrition Information
- Serving Size: 1 biscuit
- Calories: 215
- Fat: 10 g
- (Sat Fat: 6 g)
- Sodium: 550 mg
- Carbohydrate: 29 g
- (Fiber: 1 g
- Sugar: 7 g)
- Protein: 4 g
- Cholesterol: 25 mg
Dietary
The photos in this post were taken by Megan McKeehan.
For ultimate success, we highly recommend reading the tips in the full blog post above. All photos and content are copyright protected. Please do not use our photos without prior written permission. If you wish to republish a recipe, please rewrite the recipe in your own unique words. Link back to the source recipe here on The Real Food Dietitians. Thank you!
I have not tried this yet, but plan to. If you have buttermilk can you just add vanilla to it and use it, or is it better to use vinegar & milk? I already gave 5 stars because I use RFD recipes all the time and have rarely had one that we don’t love.
Hi Cindy – you can definitely use buttermilk with added vanilla. I do whenever I have some on hand and they’re every big as delicious. I hope you enjoy them as much as we do!